In Ulysses, you can easily create tables in the editor and populate them with data. You can add links, code, markup and more.
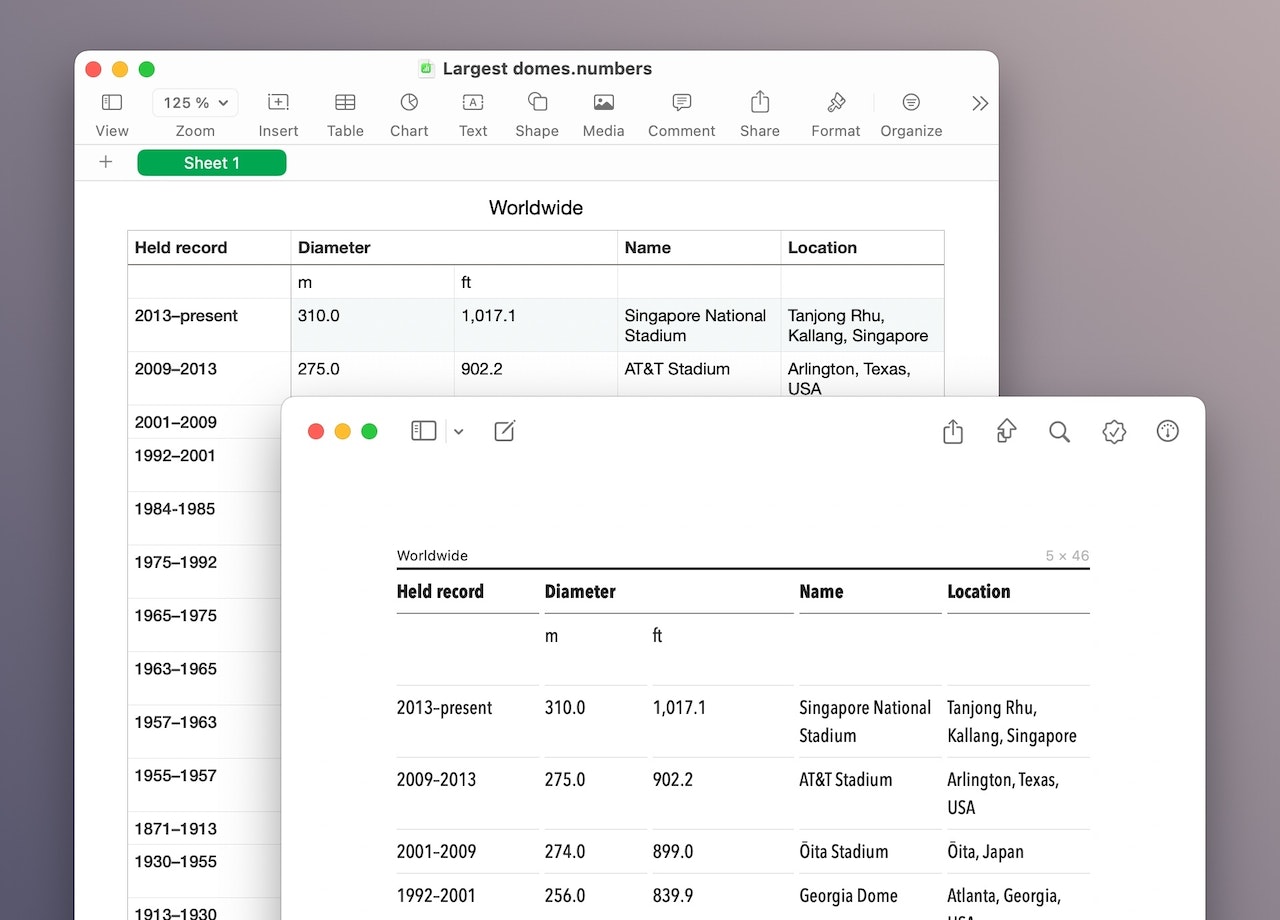
Create a Table
On Mac
To insert a table, you have three options:
- Add the markup tag for tables by typing
(tbl). - Go to Markup in the menu bar and select Table.
- Open the markup panel with the shortcut ⌘9 (command-9) and select “(tbl) Table.”
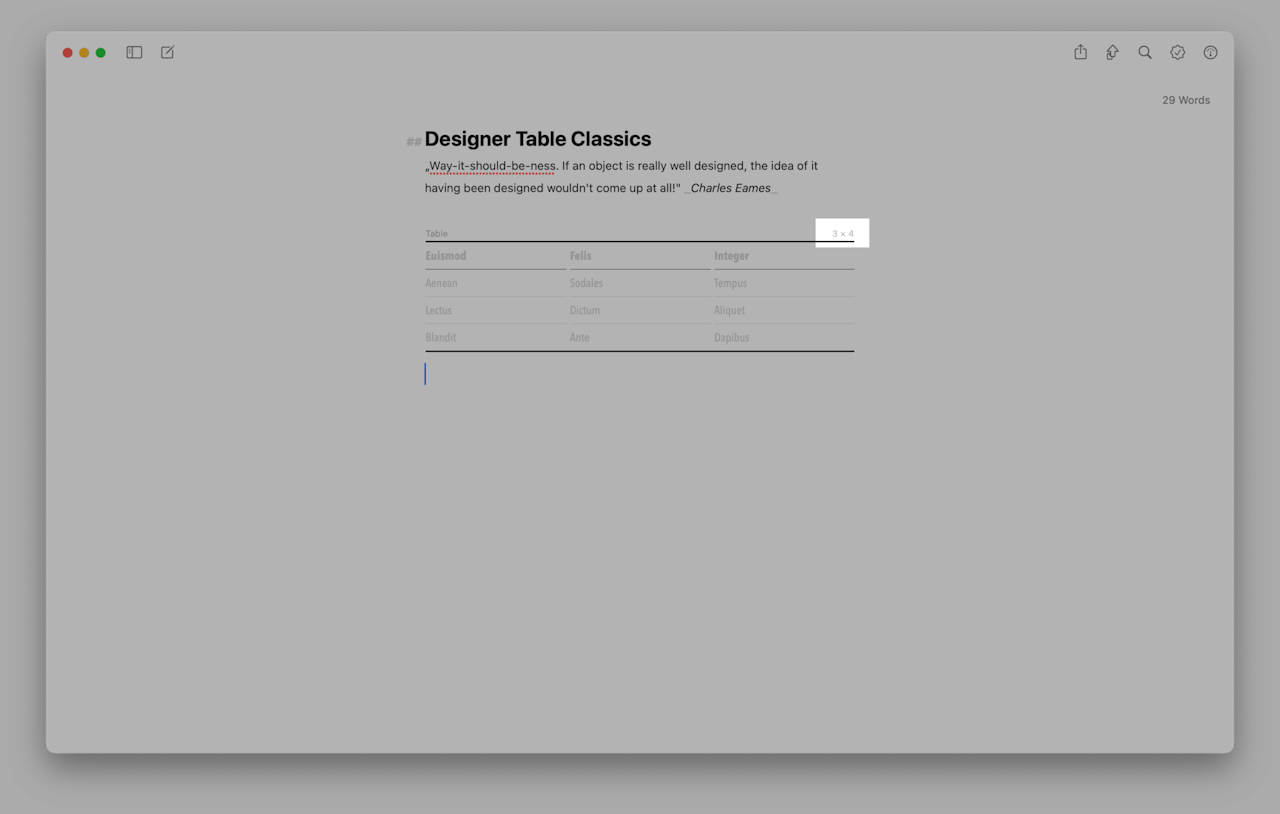
Once you have added the (tbl) tag, Ulysses will automatically insert a default table with three columns, four rows, and filler text.
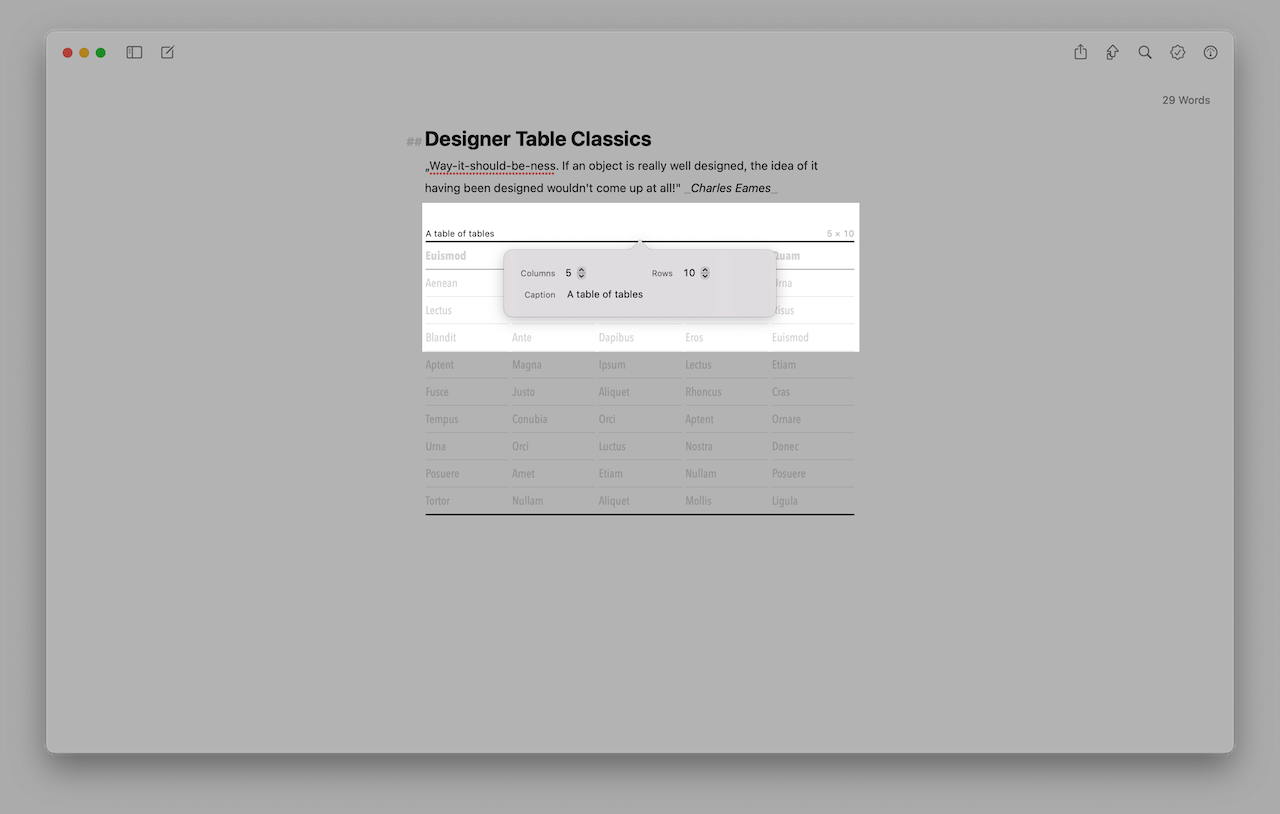
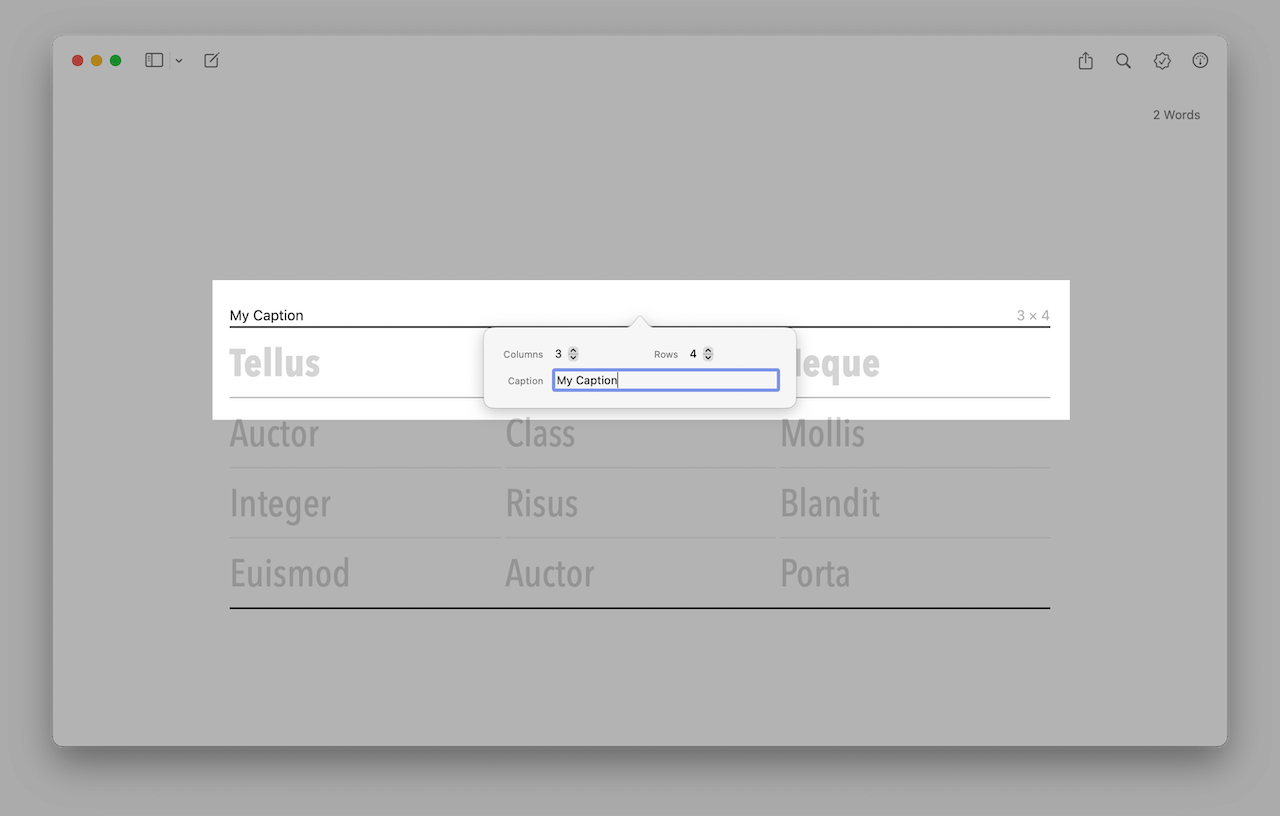
By clicking on “3 x 4”, you access the table’s options.
Here you can set the numbers of columns and rows. You can also give the table a caption.
As filler text is not exported, all cells containing lorem ipsum appear empty after export.
On iPad/iPhone
You have two options to insert a table:
- Add the markup tag for tables by typing
(tbl). - Tap the image icon above the keyboard and select Table.
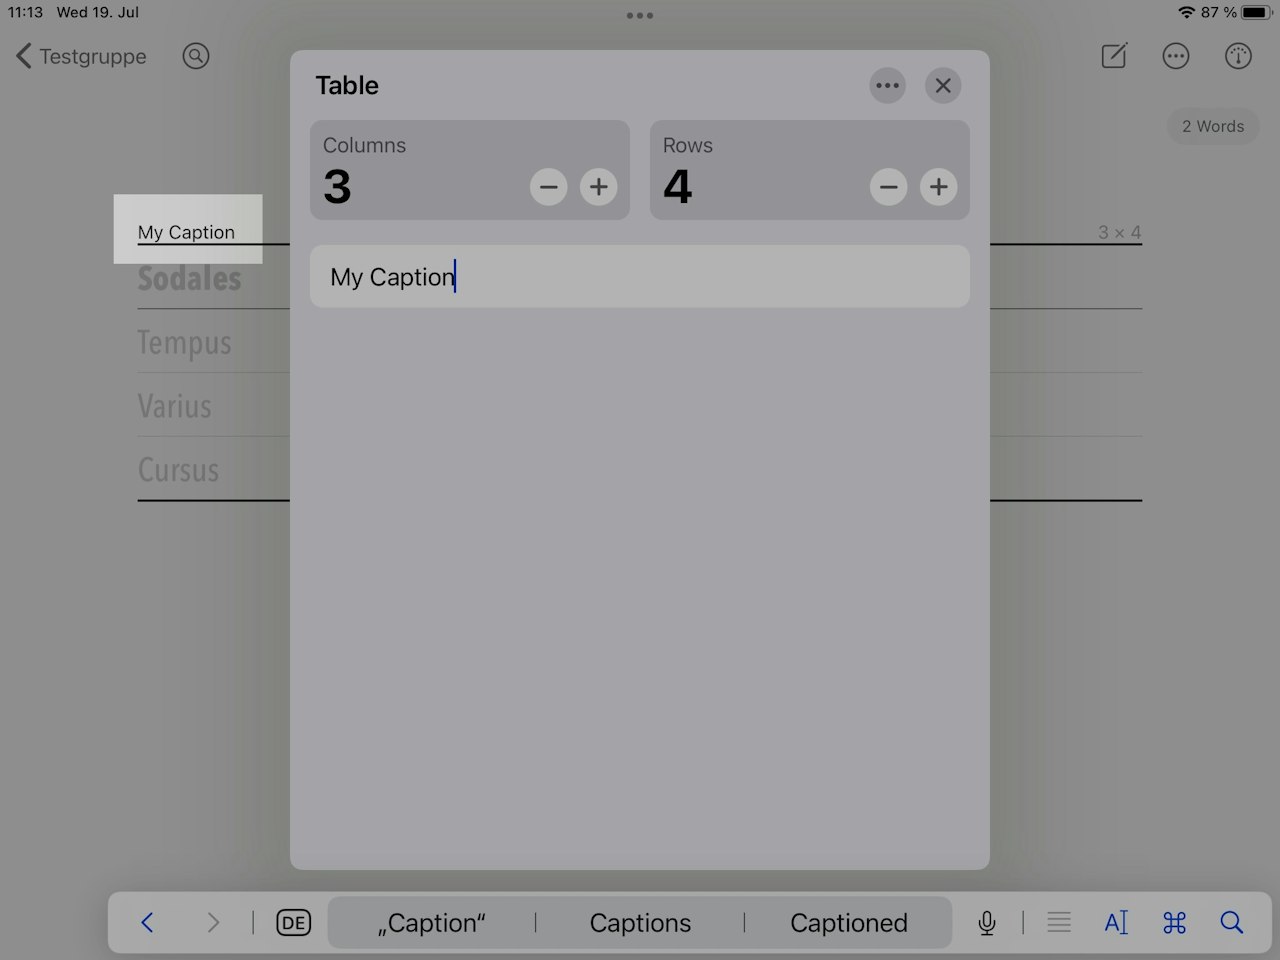
Once you have added the (tbl) tag, a context menu will open. This menu allows you to set the number of rows and columns.
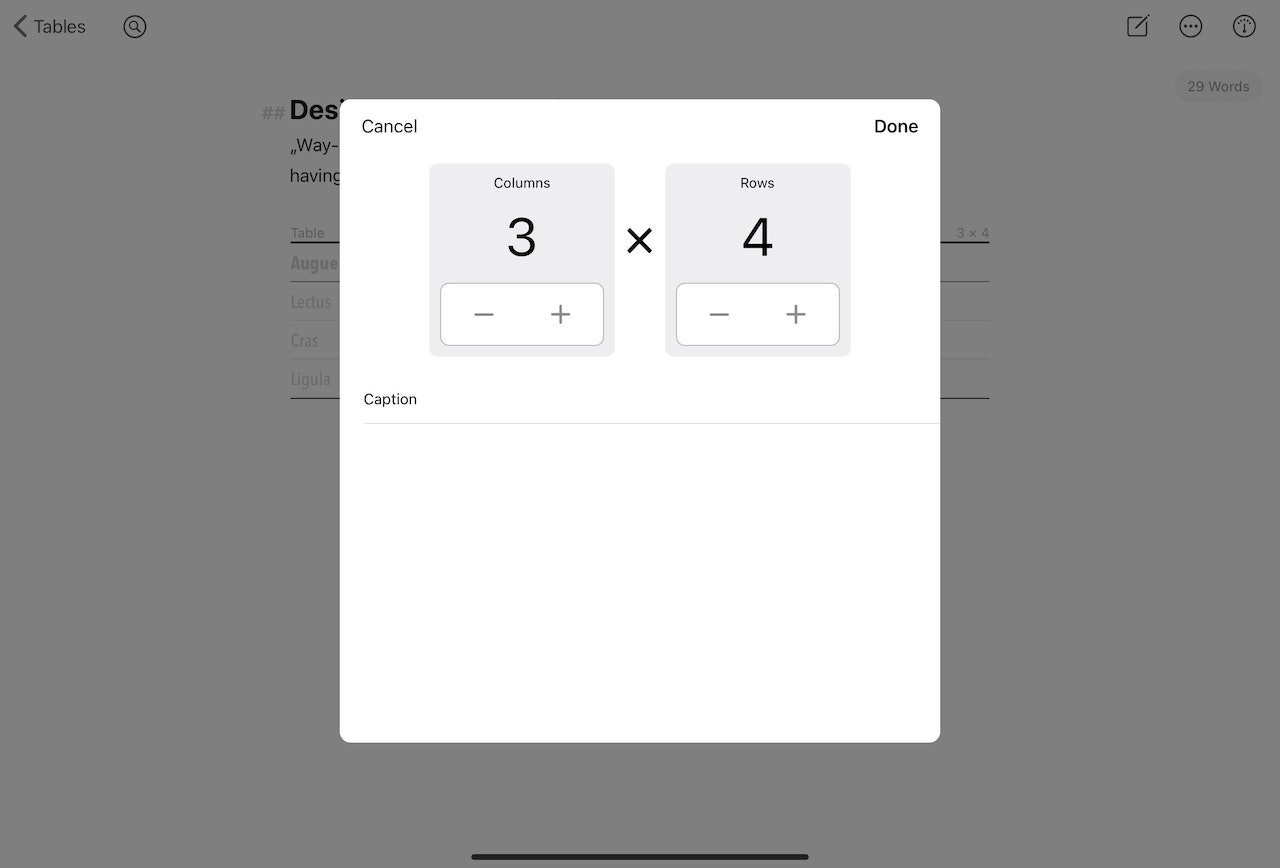
Tap Done, and Ulysses will insert a table with filler text.
As filler text is not exported, all cells containing lorem ipsum appear empty after export.
You can open the table's context menu anytime by tapping the table's very first line.
Things You Should Know
The (tbl) tag is part of Markdown XL. For the tag to work, you should be aware of a few things:
- Ensure the Markdown XL markup is selected.
- If you are using a custom markup, assign the tag (tbl) to tables in Ulysses' Settings... › Markup › [Name of Your Custom Markup].
- Tables are not available in the other built-in markups (Markdown, Minimark, Textile’d).
- However, you can use the (tbl) tag to add tables to Markdown files in the External Folders section.
Insert, Move, and Delete Rows
On Mac
Select a row by clicking on a cell and then dragging the mouse pointer beyond the edge of the cell. If you now right-click on the row, a context menu opens, and you can select the corresponding action, e.g., Insert Row.
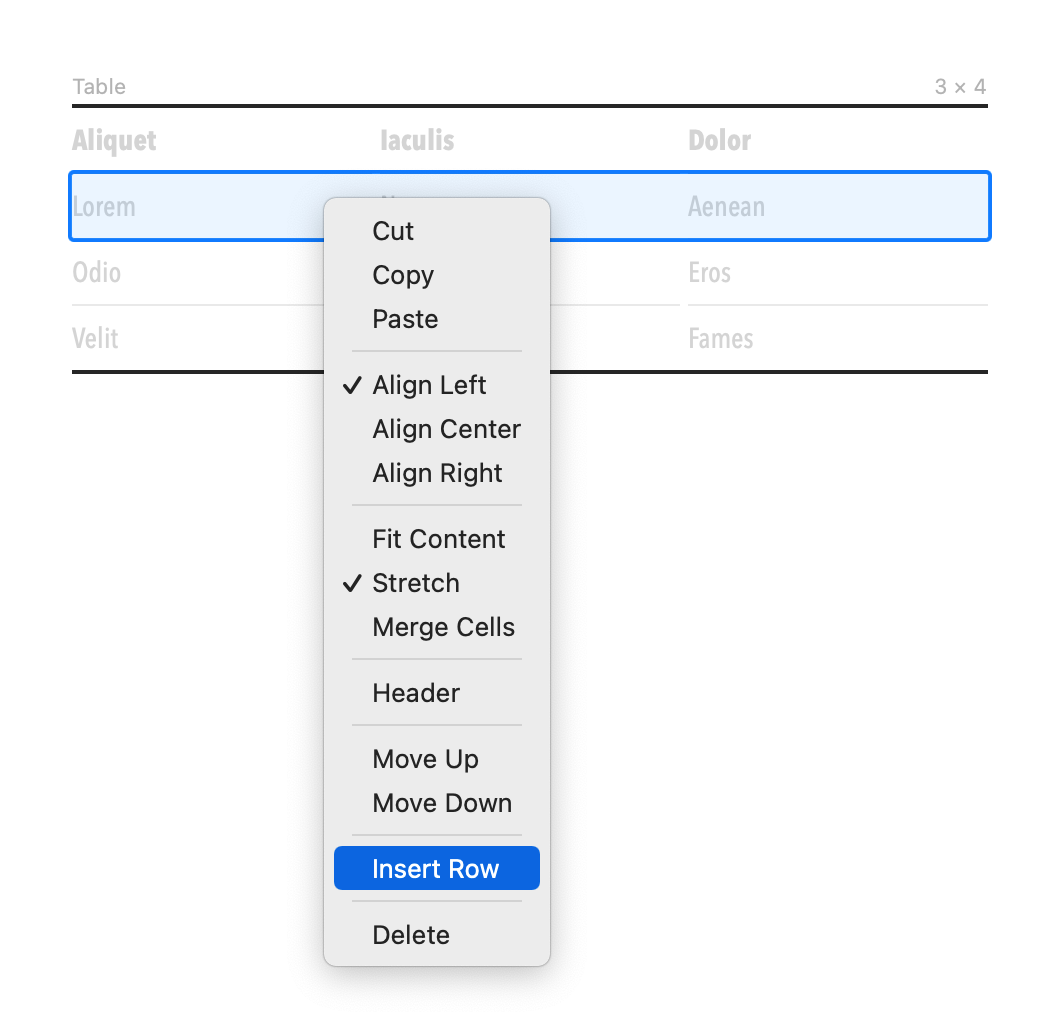
There are also options to style the row's content. You can, for example, change the text alignment or stretch/adjust the content.
All style changes to a row's content will also affect the selected columns.
On iPad/iPhone
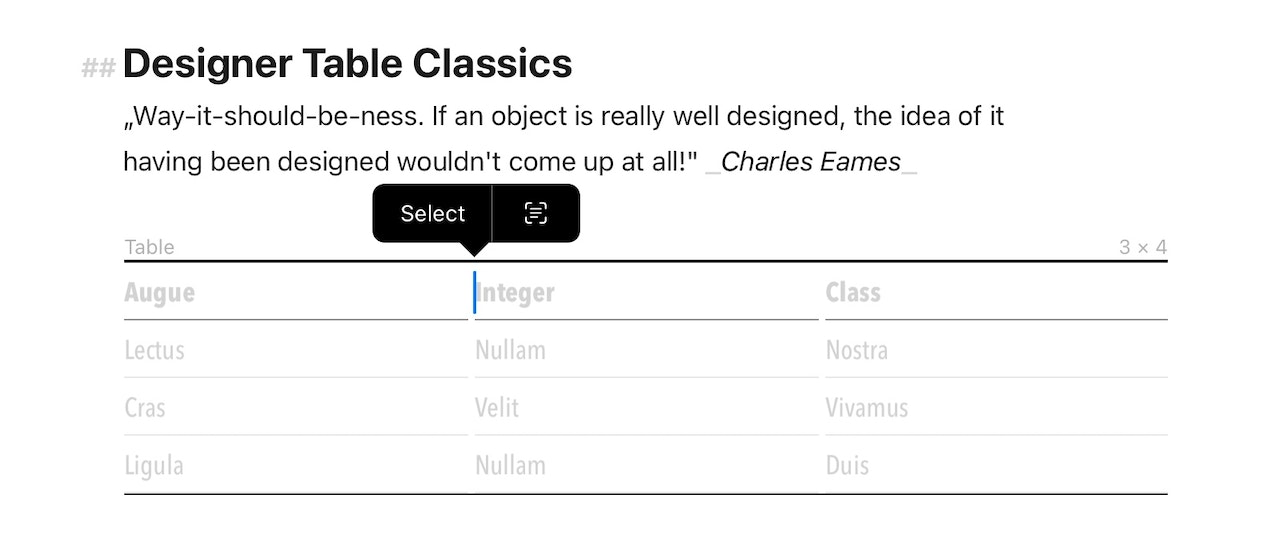
Double-tap a cell and choose Select from the pop-up menu to add, delete, or move rows up/down. Then use the selection box to select the row. Now, you have different actions to choose from.
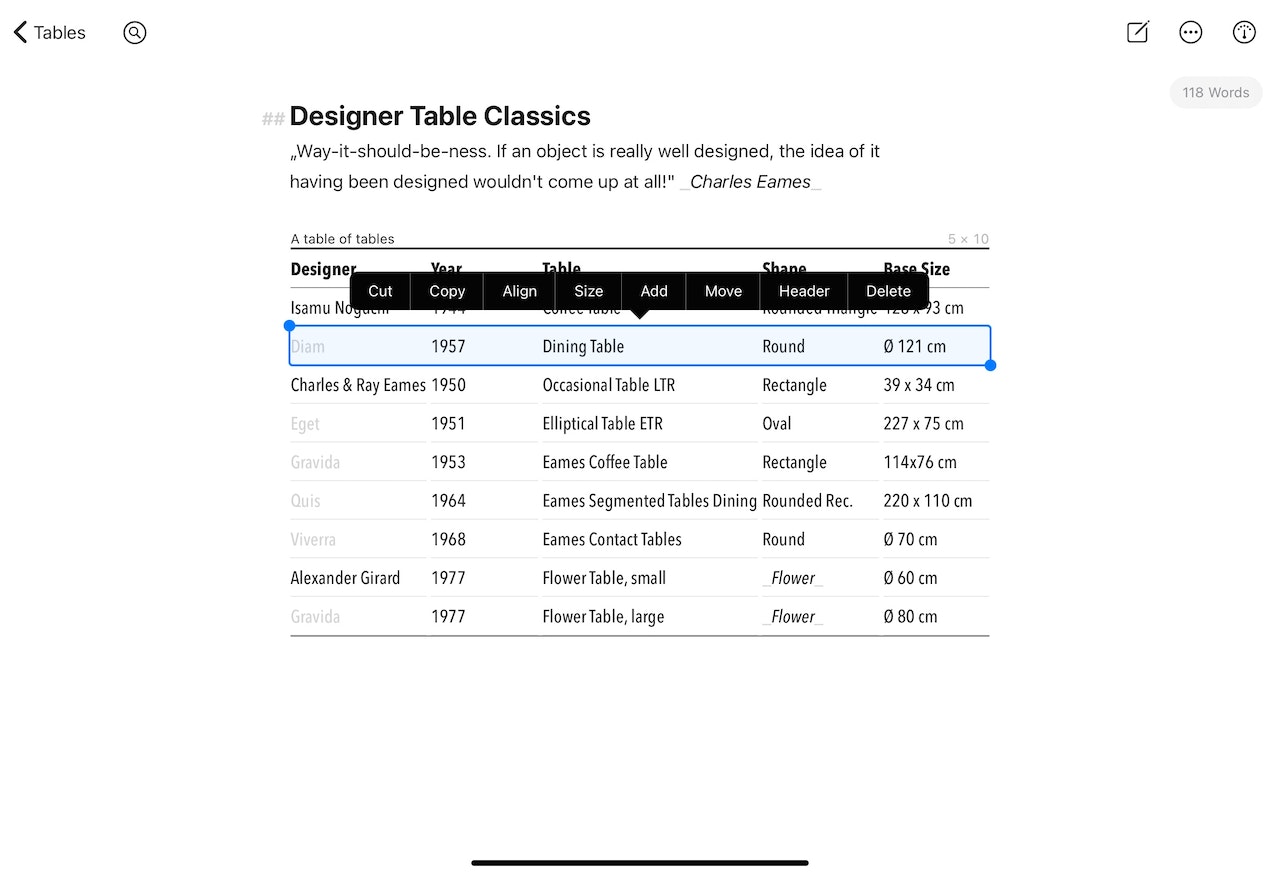
On iPhone, you have to tap the arrow in the context menu to see all actions. However, the arrow will only appear if the entire row is selected.
Alternatively, you can add or delete rows via the table settings. To open the table settings, simply tap the table's first line.
Insert, Move, and Delete Columns
On Mac
Select the column by clicking on a cell and then dragging the mouse pointer beyond the edge of the cell. If you now right-click on the column, the context menu opens. Here, you can insert or delete a column or move the selected column to the left/right.
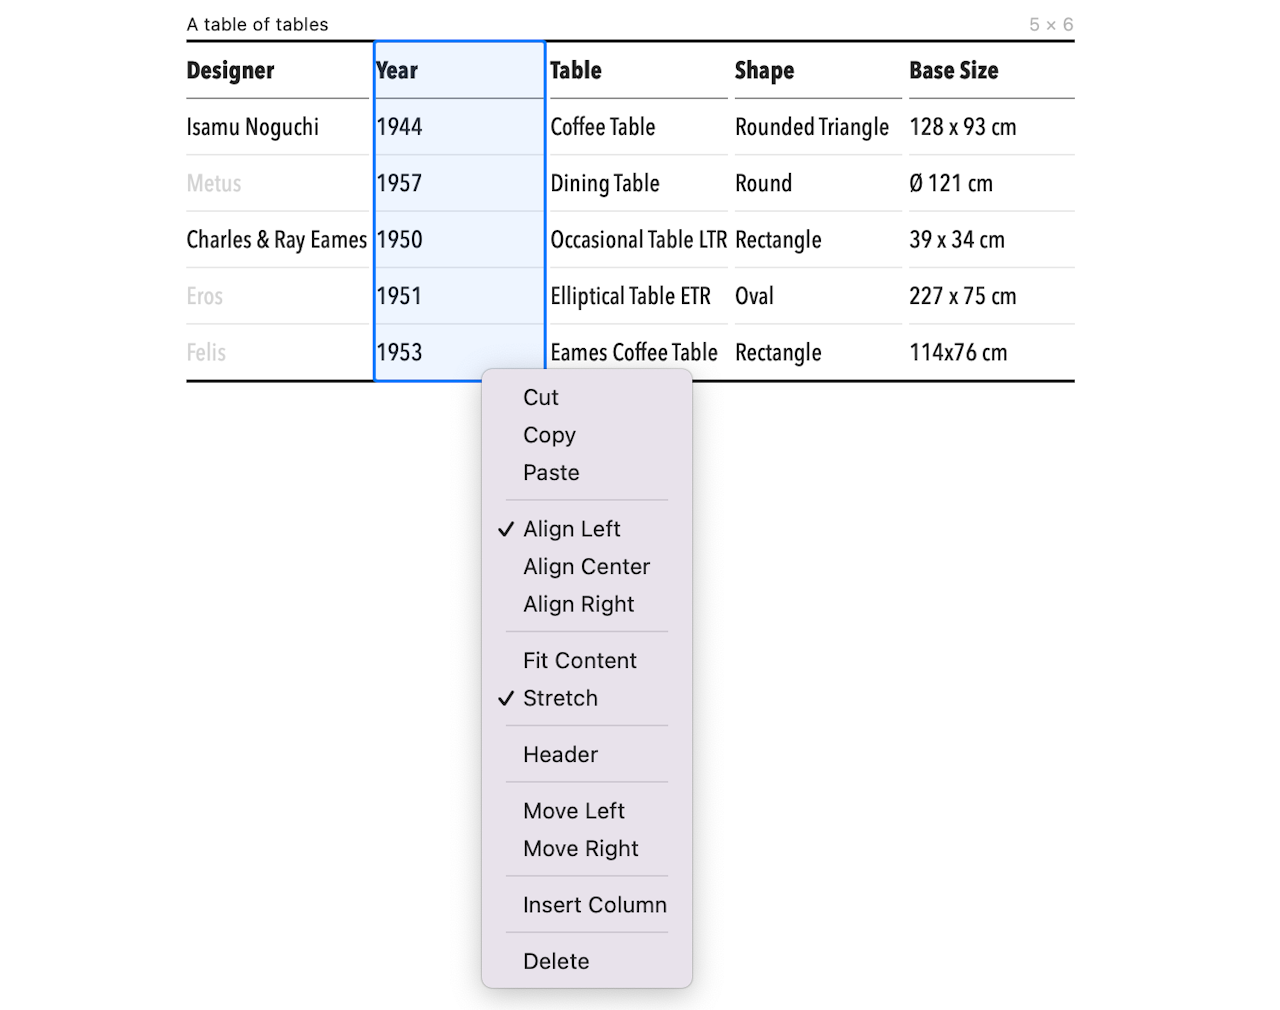
Additionally, there are options to style the content of your column, i.e., change the text alignment or stretch/fit the content.
All style changes of a column's content will affect the whole column, regardless of how many rows in a column are selected.
On iPad/iPhone
To add, delete, or move columns left/right, double-tap a cell and choose Select from the pop-up menu.
Then use the selection box to select the column. Now you can choose the desired action.

On iPhone, you have to tap the arrow in the context menu to see all actions. However, the arrow will only appear if the entire column is selected.
Alternatively, you can add or delete columns via the table settings. To open the table settings, simply tap the table's first line.
Add/Remove Captions
You can also give your table a caption.
On Mac
- Click on the header row to open the table's context menu.
- Click on the space next to Caption to enter your text.
On iPad/iPhone
- Tab on the header row to open the table's context menu.
- Tab the entry field named Caption to enter your text.
The table's caption will be displayed in the upper left corner of your table.
Import a Table
You can import tables from HTML, Markdown, and DOCX formats in Ulysses. Additionally, you can easily copy and paste tables from software like Pages, Word, or Excel. However, it's worth noting that RTF format is not currently supported for table import.
HTML
- Copy your HTML table. Select Paste from... › HTML to paste your table into the editor.
Alternatively, there's still the option to create more advanced HTML tables by using the raw source tag ~~ and selecting HTML in the export menu.
Markdown
- Copy your Markdown table.
- Select Paste from... › Markdown to paste your table into the editor.
DOCX
- Right-click on a DOCX file you'd like to import.
- Select Open with... › Ulysses in the context menu.
Tables contained in the DOCX file are imported automatically.
Export a Table
Tables can be exported in almost all formats. However, RTF is currently not supported. We have adapted our built-in export styles for HTML, ePub, and PDF/DOCX.
On Mac, you can customize the appearance of tables in your export document. More on this below.
Style Your Table
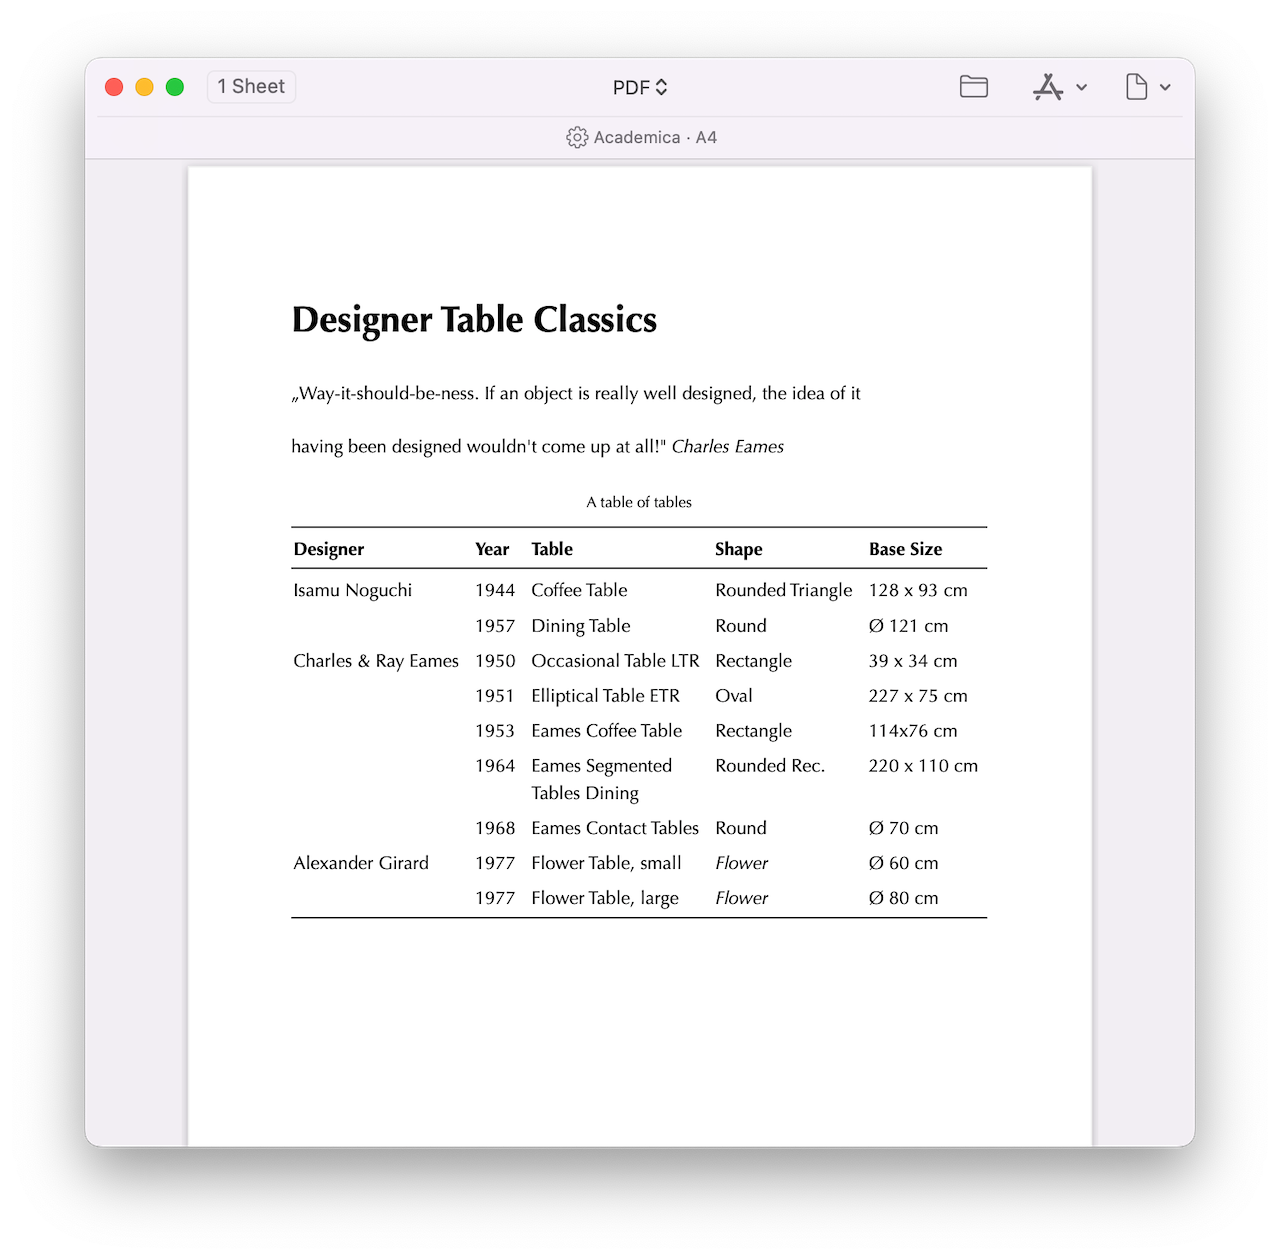
By default, your table will have a simple and clean appearance when exported.
If you want to customize the style of your table according to your preferences, we can show you how to do that. Let's start by adding row separators as an example.
Export style customization is currently limited to Mac users only. If you're not on a Mac and require a custom style, please reach out to our support team.
Add Row Separators
- Open Settings... in Ulysses and go to Styles.
- Choose a style from the PDF/DOCX section, e.g., Swiss Knife.
- Right-click on the stylesheet and Duplicate the style.
- Open the duplicated stylesheet in an editor of your choice, e.g., TextEdit or TextMate.
- Find the selector
table-celland add the linerow-separator-style. Here is an example:
table-cell {
        padding-bottom: 8pt
        padding-top: 8
        line-height: 16pt
        row-separator-style: solid
}- Save the stylesheet and rename it (optional).
- Select your customized export style in the export preview.
When modifying a style sheet, steps 1 to 4 and 6 to 7 remain constant. The only variable step is step 5, which depends on the specific changes you want to make.
To simplify the process of adjusting the style, we'll guide you through making some commonly requested changes by focusing on varying step number 5.
Add Column Separators
Find table-cell and add the line column-separator-style:
table-cell {
                padding-bottom: 8pt
                padding-top: 8pt
                line-height: 16pt
                column-separator-style: solid
                }
Currently, the separator style is limited to solid or none. However, you can adjust its color and width. Find out how in the Ulysses Style Reference.
Alternate Row Color
Find table-cell and add the line alternate-row-color:
table-cell {
                padding-bottom: 8pt
                padding-top: 8pt
                line-height: 16pt
                alternate-row-color: #D3D3D2
                }
You can set colors using RGB values or Hex color codes. For instance, for light grey, you can use the RGB value rgb(211,211,210) or #D3D3D2.
Alternate Column Color
Find table-cell and add the line alternate-column-color:
table-cell {
                padding-bottom: 8pt
                padding-top: 8pt
                line-height: 16pt
                alternate-column-color: rgb(211,211,210)
                }
Change Cell Color
Find table-cell and add the line cell-color:
table-cell {
                padding-bottom: 8pt
                padding-top: 8pt
                line-height: 16pt
                cell-color: rgb(211,211,210)
                }
More Options
Currently, you have the option to style the following elements of your table:
- border color
- border style
- border width
- caption placement
- padding
- body
- header
Please note: We have highlighted the most popular style adaptations here. For all table styling options in Ulysses, see our Ulysses Style Reference.
For general styling options, please also check the guide Customize an Export Style.