Ulysses distinguishes between writing and formatting the text during export to provide a distraction-free environment. This means that you need to customize the export style to change the appearance of your exported file.
Please note: The ability to customize an export style is currently only available for Mac.
If you do not have a Mac or need help customizing your export style, please get in touch with our support team directly.
Here's how to customize an export style:
- Go to the menu Ulysses and select Settings…
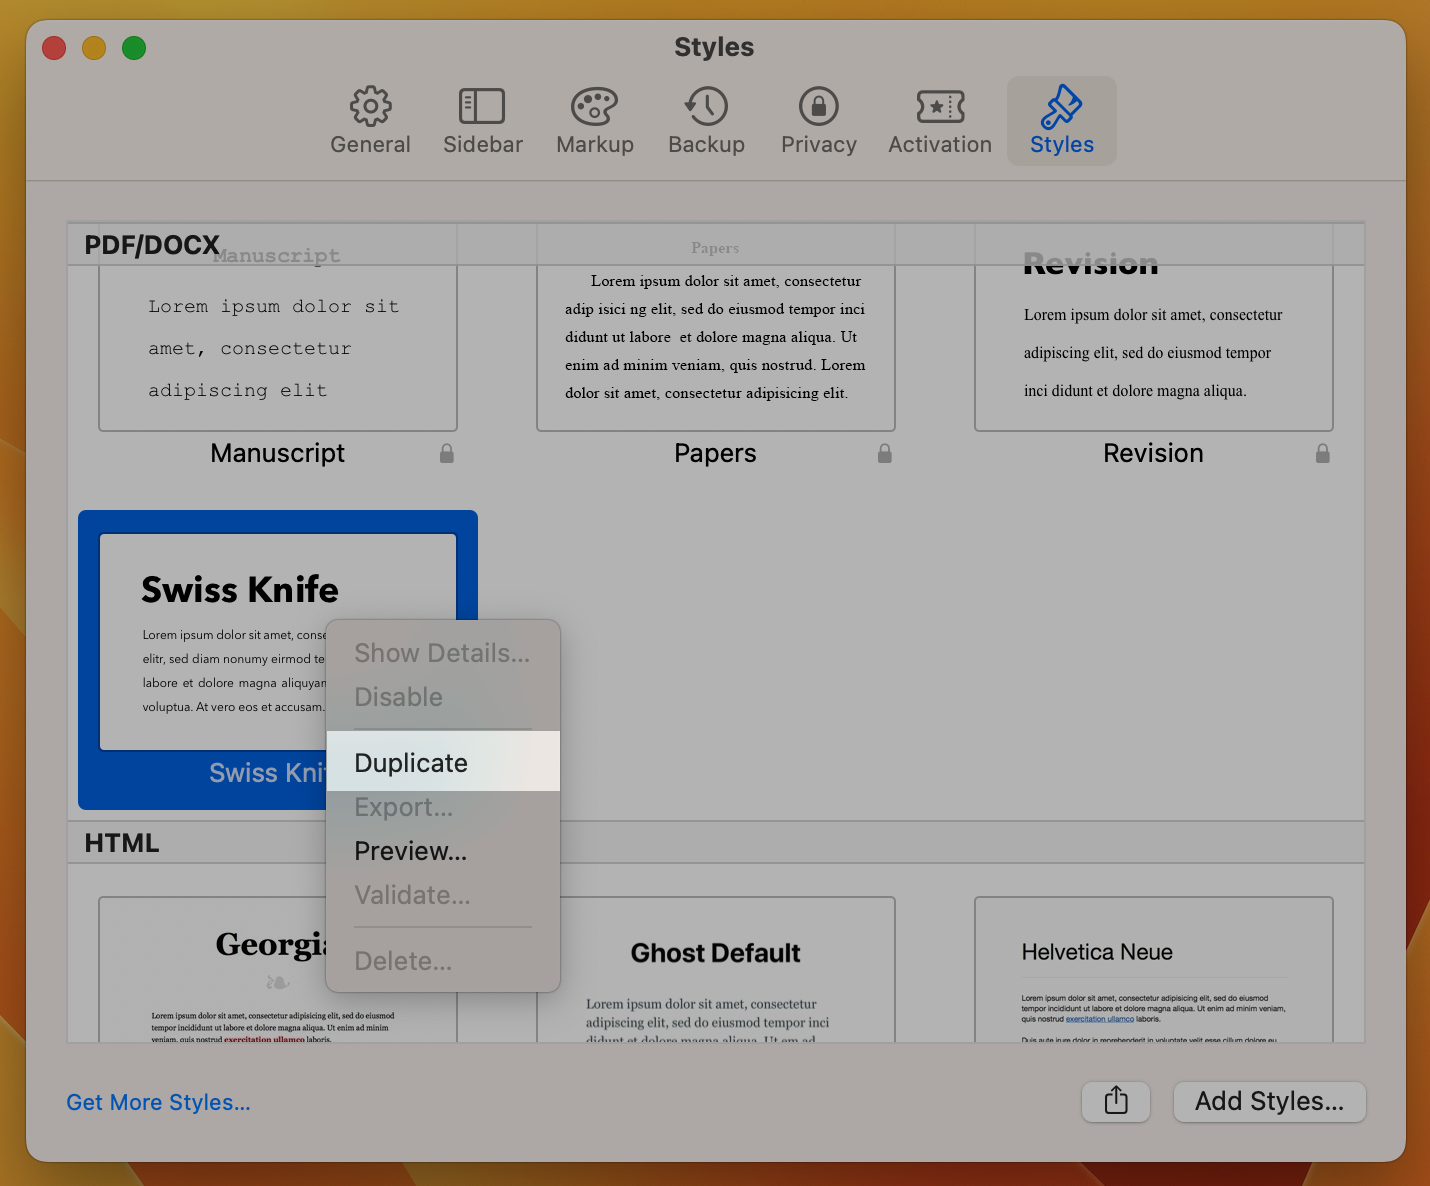
- Switch to Styles and choose a style from the PDF/DOCX section, e.g., Swiss Knife
- Right-click on the stylesheet and select Duplicate
- Right-click the duplicated stylesheet and select Edit in
- Select an editor of your choice, e.g., TextEdit or TextMate
- From the list below, choose what you want to adjust in your export style to see the next step:
Insert Page Breaks
There are two ways to achieve page breaks:
Use Divider Tag
To manually insert page breaks, you can use the Divider tag
----. Some export styles, like “Swiss Knife,” will then insert a page break when exporting. However, for styles like Papers, you’ll need to modify the style sheet for this to work.
To do this, locate paragraph-divider in the style sheet and adjust it as follows:paragraph-divider page-break: after }Use Automatic Rules
You can also set up automatic rules so that, for example, every level 2 heading is preceded by a page break. To do this, find heading-2 in the style sheet and add the line page-break: before as shown here:
heading-2
                	font-size:     24pt
                	line-height:   28pt
                	margin-top:    7mm
                	margin-bottom: 5mm
                	page-break:    before
                }
Add Margins
A common style for novels is to start a new chapter in the lower half of the page. This can be done by adjusting the margins.
Locate the heading where you want to add a margin and set margin-top to your desired size:
heading-1 {
                	font-size:				32pt
                	font-weight:			bold
                	line-height:			2em
                	margin-top:				300pt
                	margin-bottom:			30pt
                }
First Line Indent
To indent the first line of the first paragraph, find or add the selector
paragraphand adjust thefirst-line-indent. Here is an example:paragraph { first-line-indent: 5pt }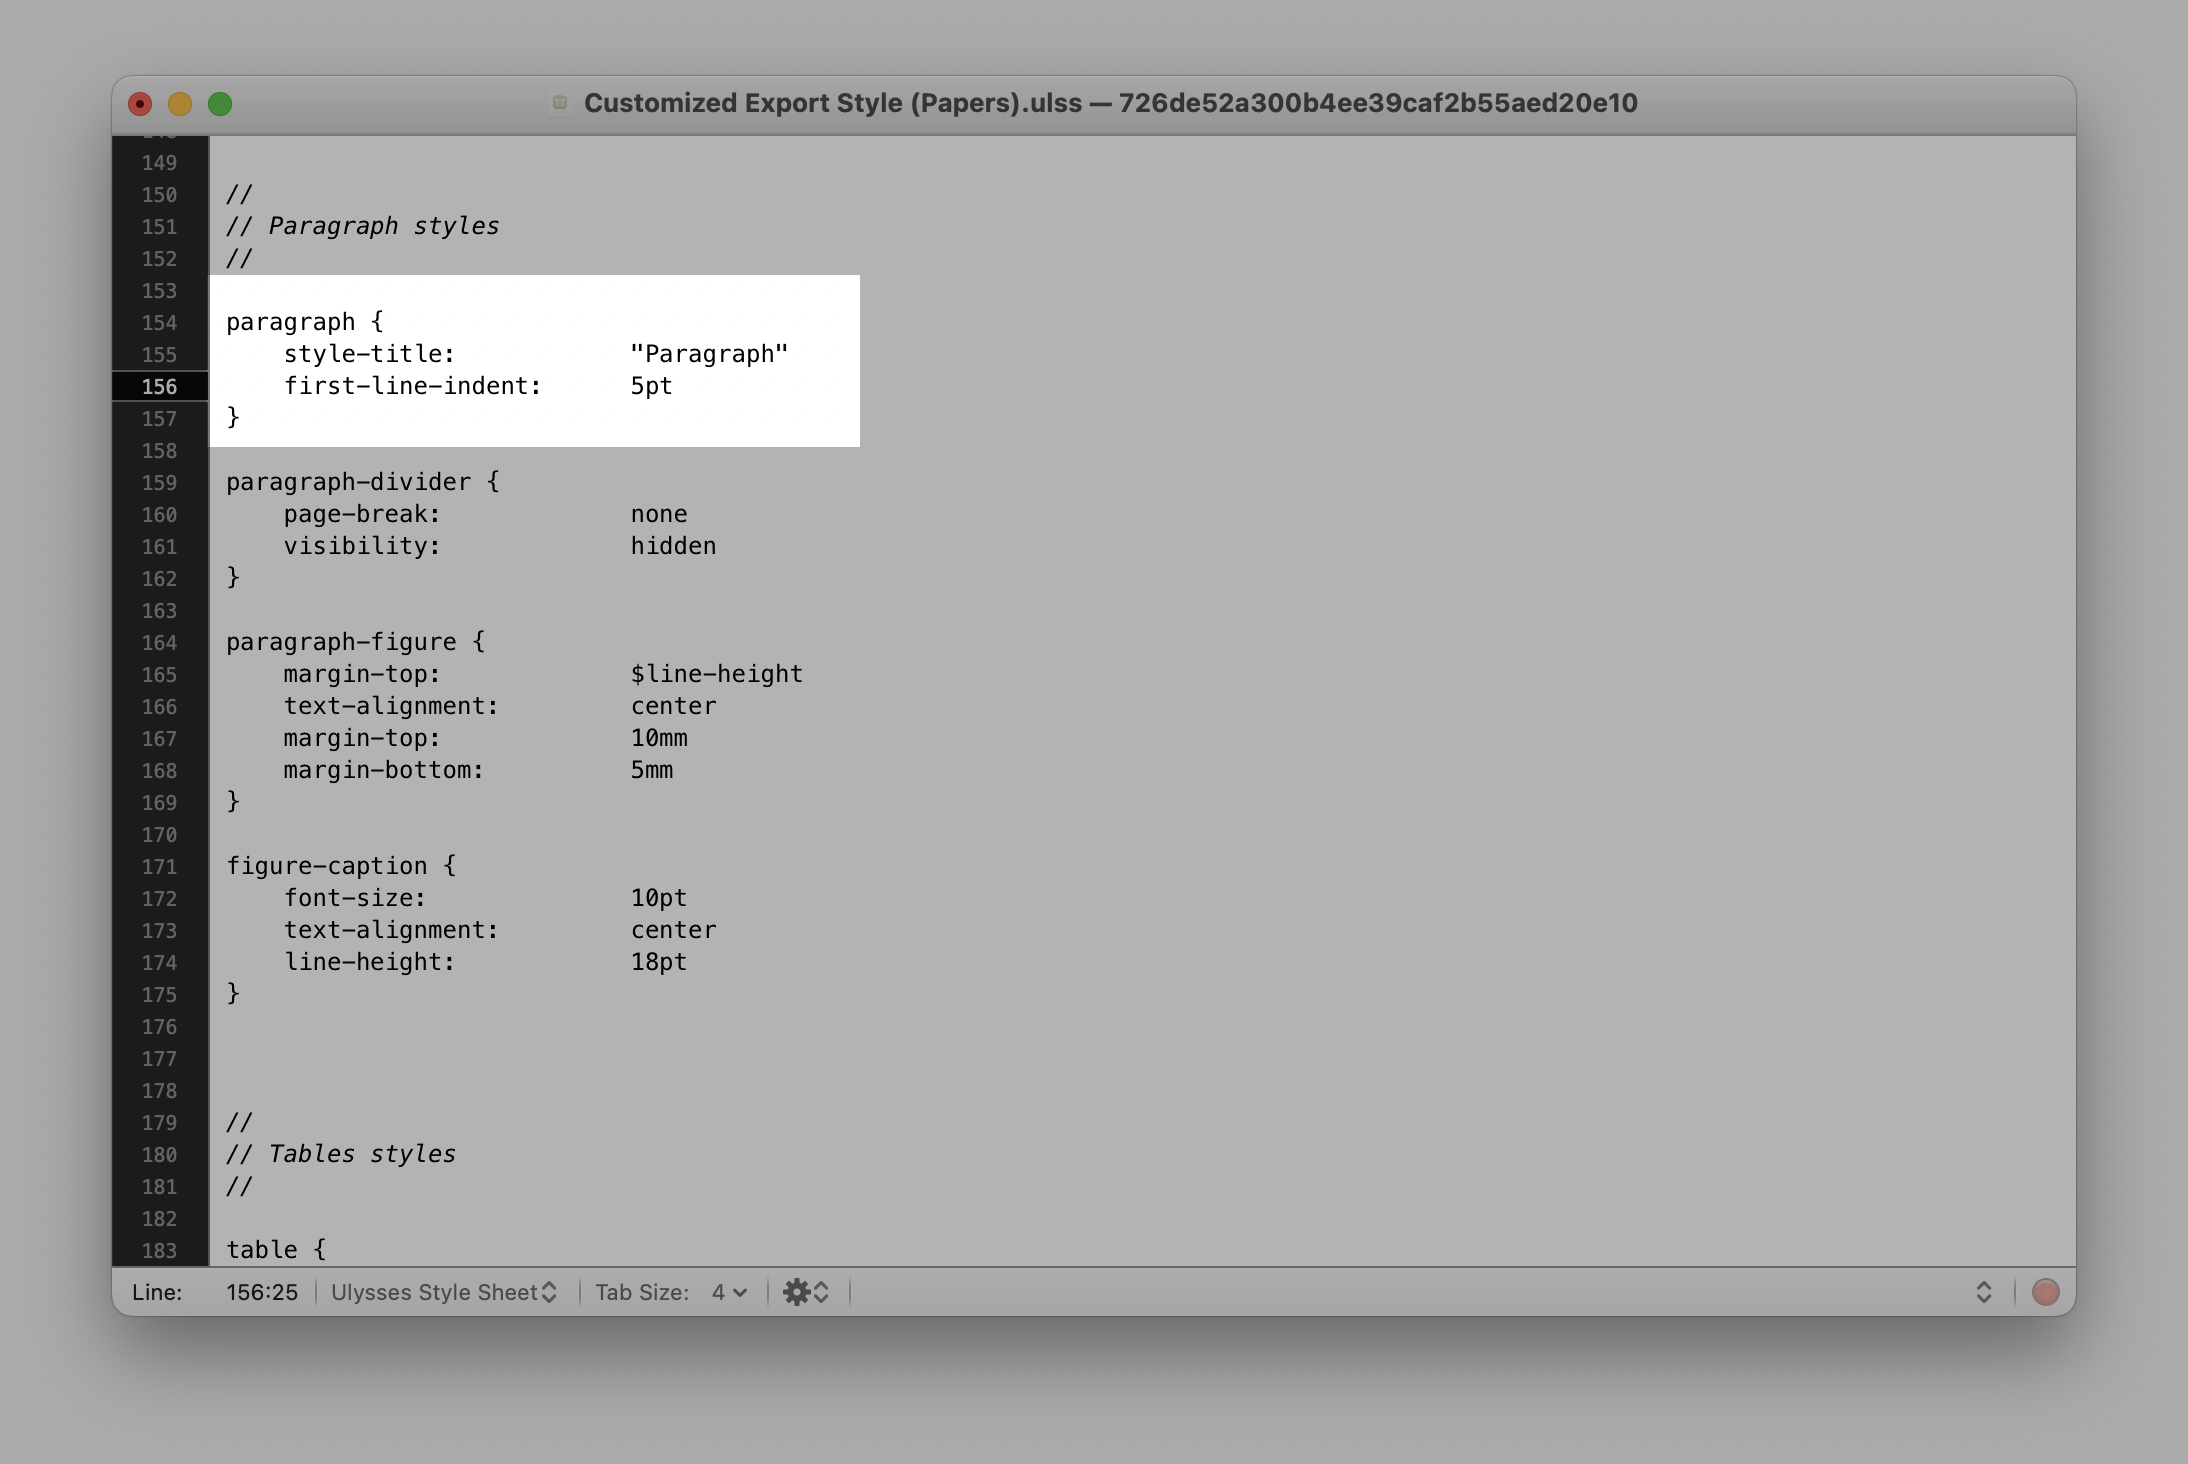
You can also indent the first line of a paragraph, except for the first paragraph. To do so, find or add the selectorparagraph + paragraphand adjust thefirst-line-indent. Here is an example:paragraph + paragraph { first-line-indent: 5pt }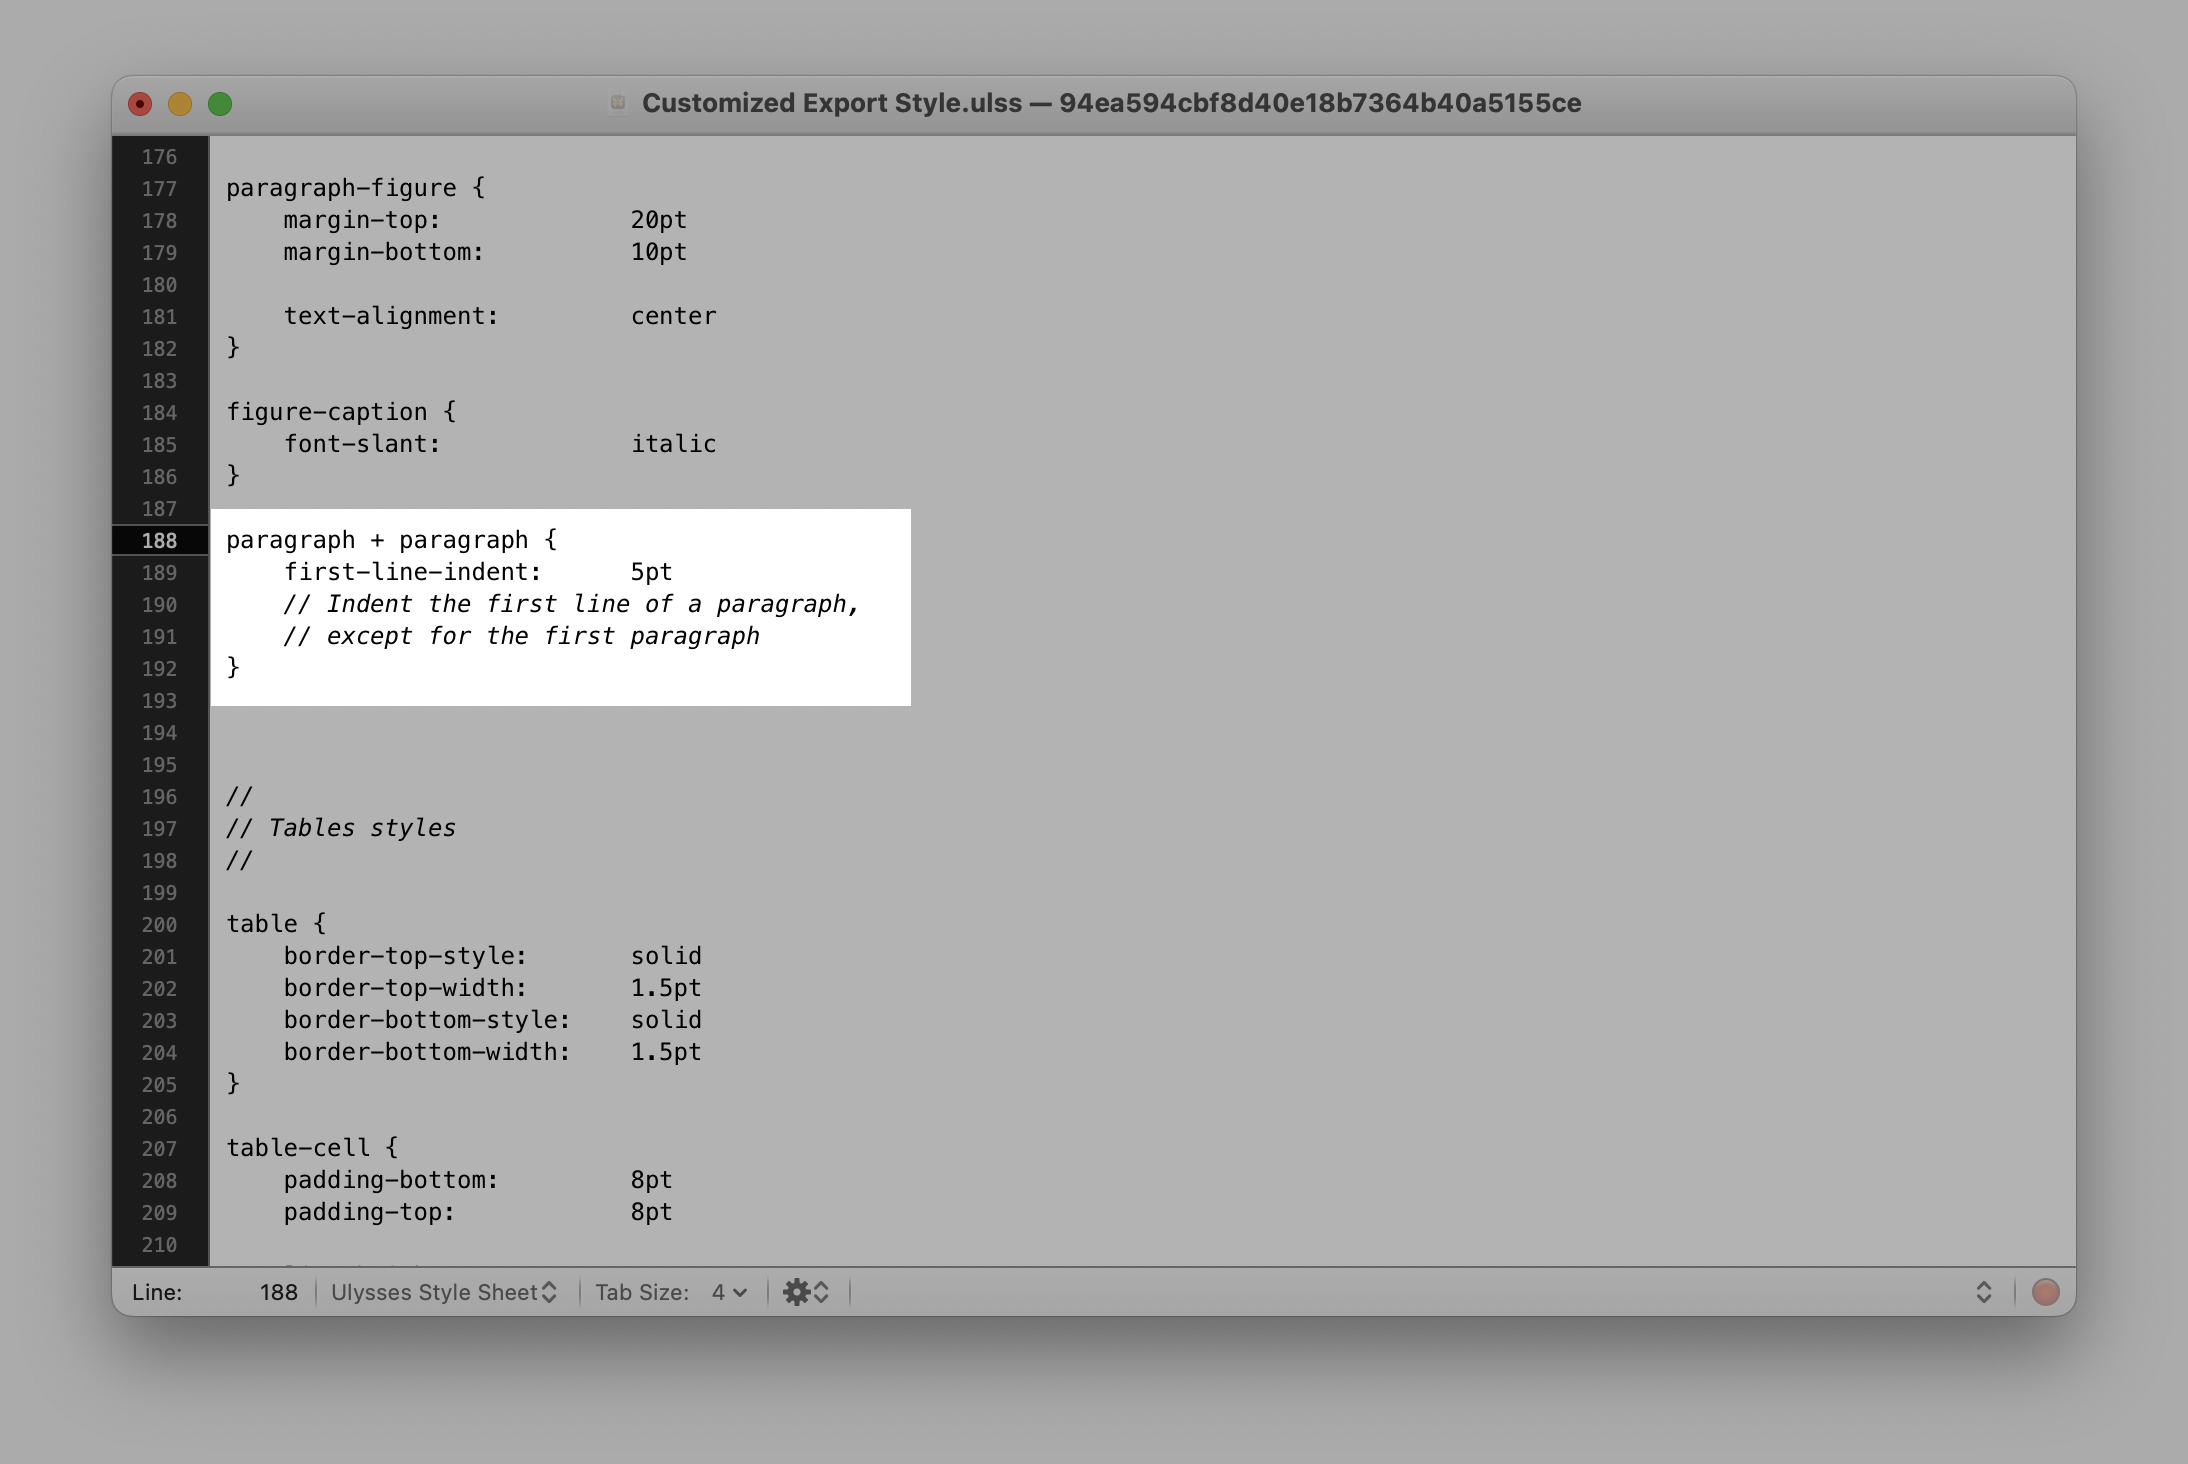
Typography
To adjust the default typography, find the selector
defaultsand change the name offont-family. Here is an example:defaults { font-family: "Optima" font-size: 12pt line-height: 24pt text-alignment: justified hyphenation: yes }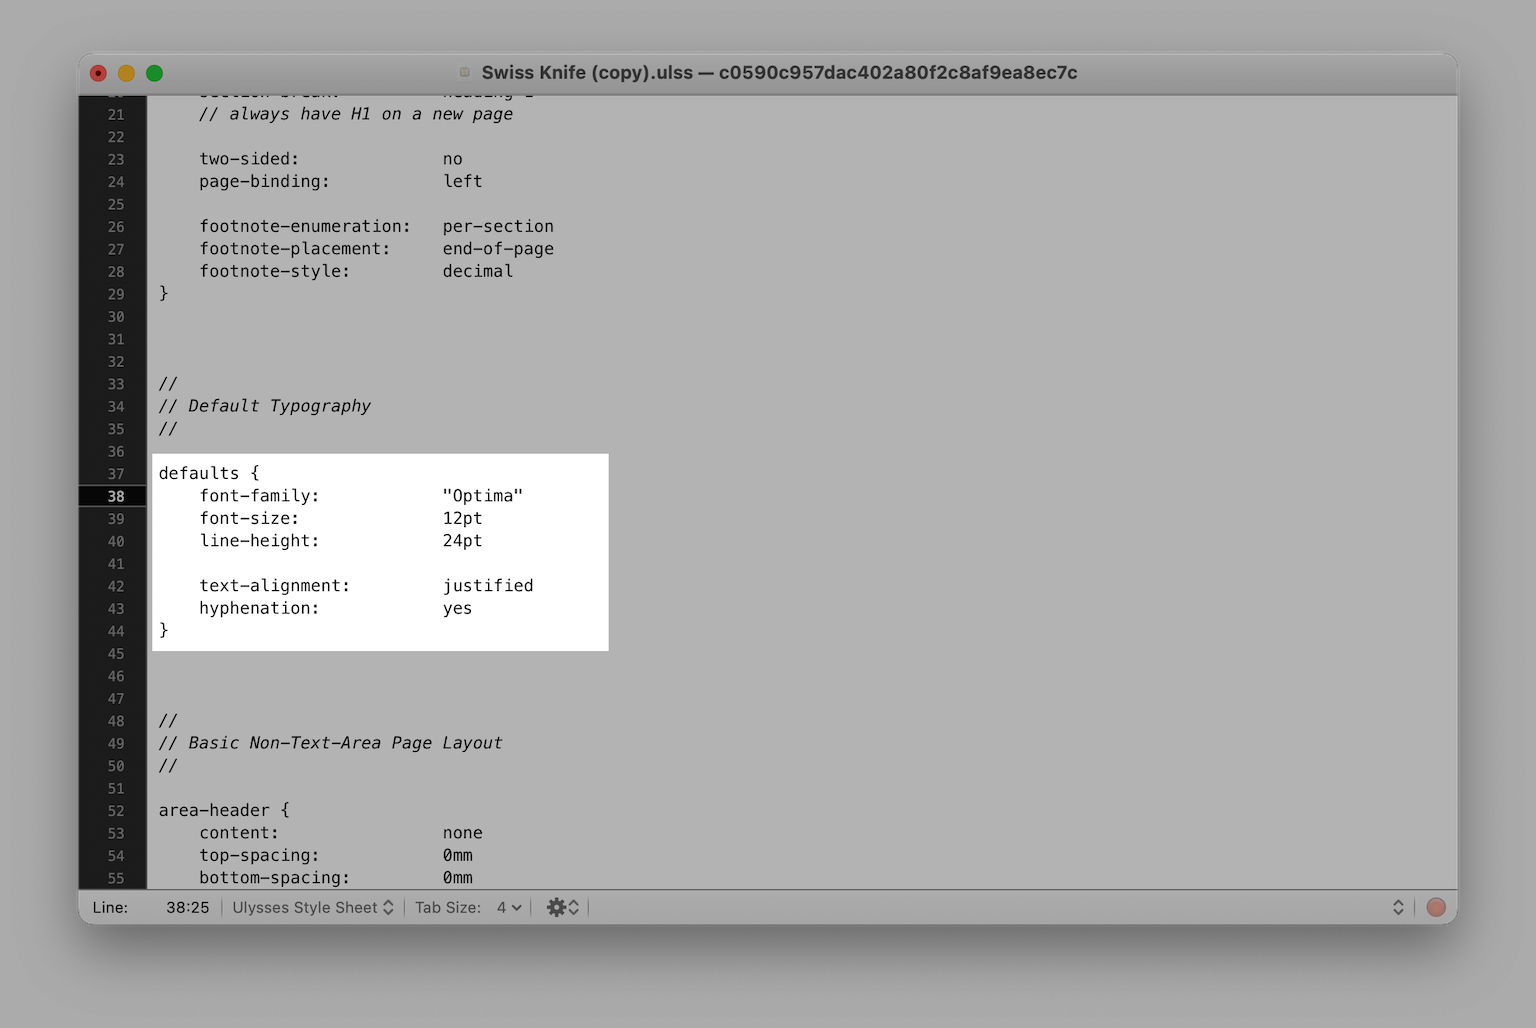
You can also change the font family of other selectors such as headings or footnotes. In this case, find the specific selector (for example
heading-1) and adjust the font to your liking.Font Size
To adjust the default font size, find the selector
defaultsand adjust the value offont-size. Here is an example:defaults { font-family: "Avenir Next" font-size: 14pt line-height: 28pt text-alignment: justified hyphenation: yes }
You can also change the font size of all selectors, such as headings or footnotes. In this case, find the specific selector (for exampleheading-1) and adjust it to your liking.You may also want to adjust the line height accordingly when you adjust the font size. This will make the result look proportional.
Text Alignment
Paragraph Text
To define the horizontal alignment of a paragraph’s text, find the selector
defaultsand add or changetext-alignmenttoleft,right,center,justifiedorauto. Here is an example:defaults { font-family: "Avenir Next" font-size: 12pt line-height: 24pt text-alignment: left hyphenation: yes }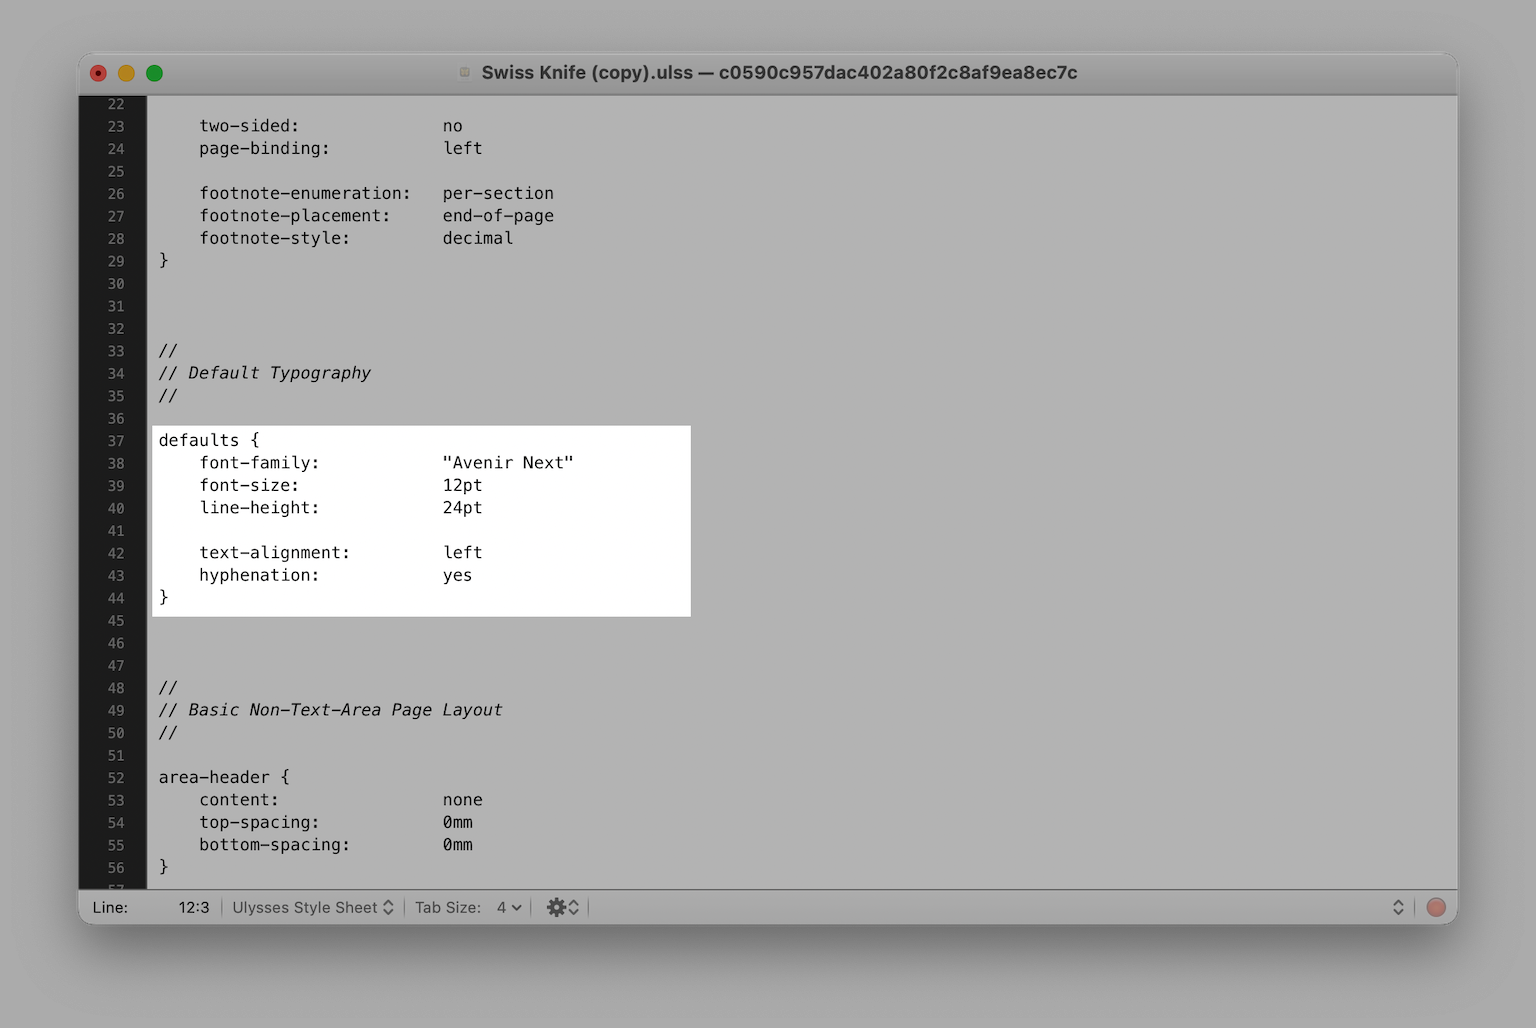
HeadingsTo adjust the
text-alignmentof your headings, please find the selectorheading-all:heading-all { line-height: 100% keep-with-following: true text-alignment: center }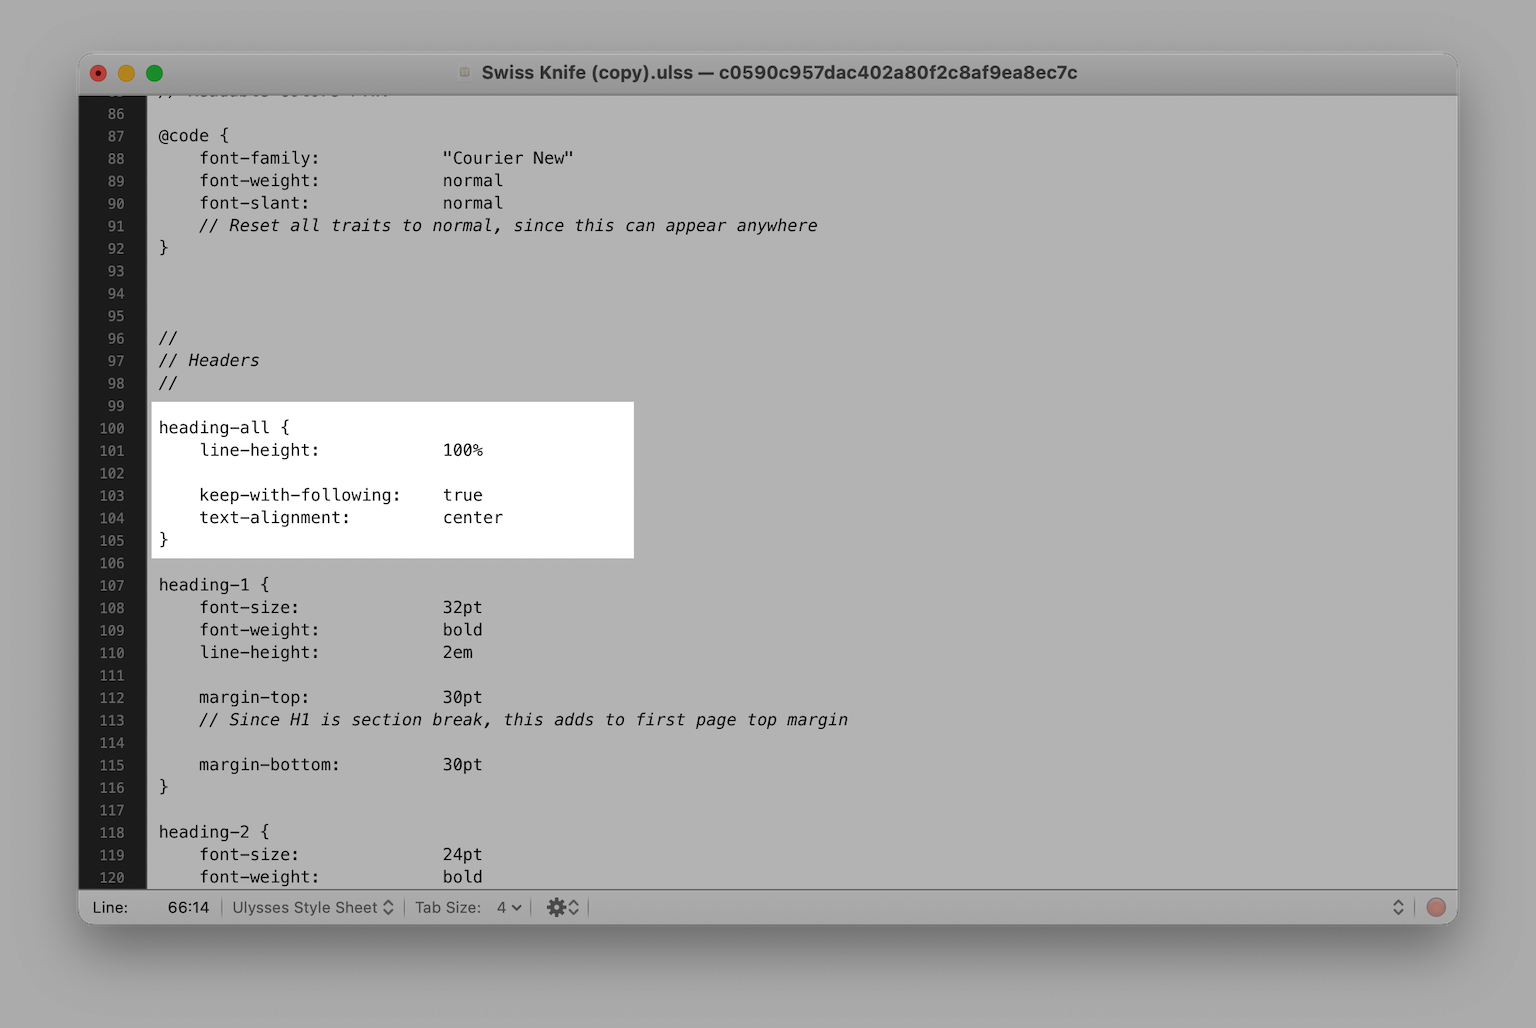
Images & Equations
In Ulysses, images and equations are categorized as figures. To adjust their
text-alignment, navigate to the selectorparagraph-figure(found under Paragraph styles) and modify thetext-alignmenttoleft,center, orright. Here's an example:paragraph-figure { margin-top: 20pt margin-bottom: 10pt text-alignment: left }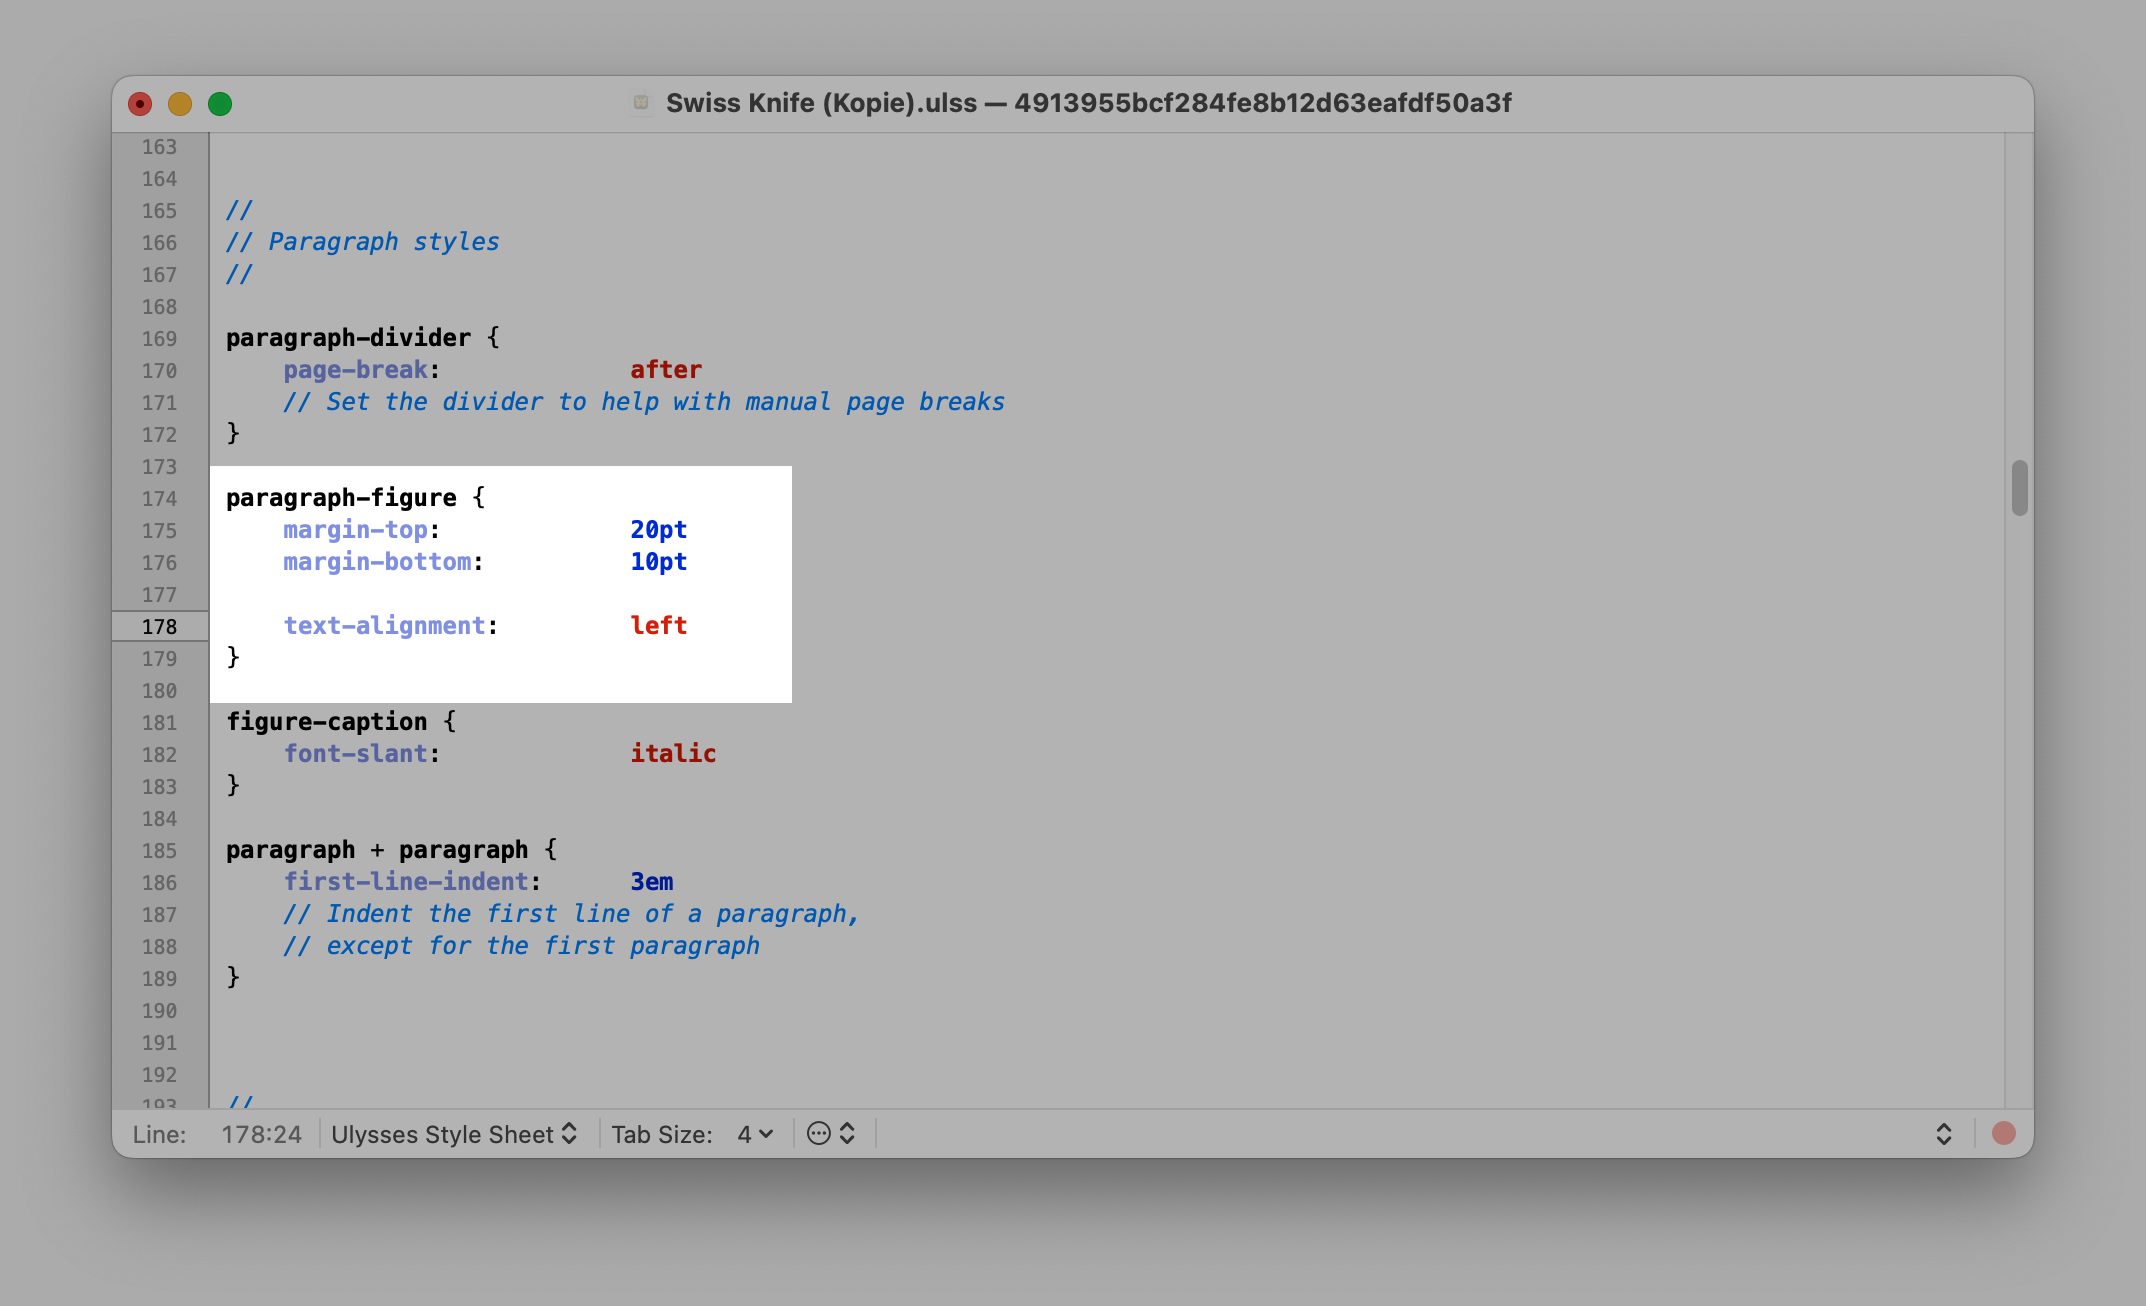
Please be aware that any adjustments made to the
paragraph-figuresetting will affect all images and equations throughout the document. Also, if you have captions, you'll need to set the text alignment forfigure-captionaccordingly.Footnote Placement
To adjust the placement of your footnotes, find the selector
document-settingsand change thefootnote-placementvariable toend-of-document,end-of-sectionorend-of-page. Here is an example:document-settings { footnote-enumeration: per-section footnote-placement: end-of-document footnote-style: decimal }
Custom Header/Footer
In Ulysses, you can only add the top-level heading or page number to your header or footer. However, a workaround allows you to display customized text in the header or footer of your document.
Find the selector
document-settingsand add the following text:page-number-format: "Individual Text / %p"; page-number-style: decimal;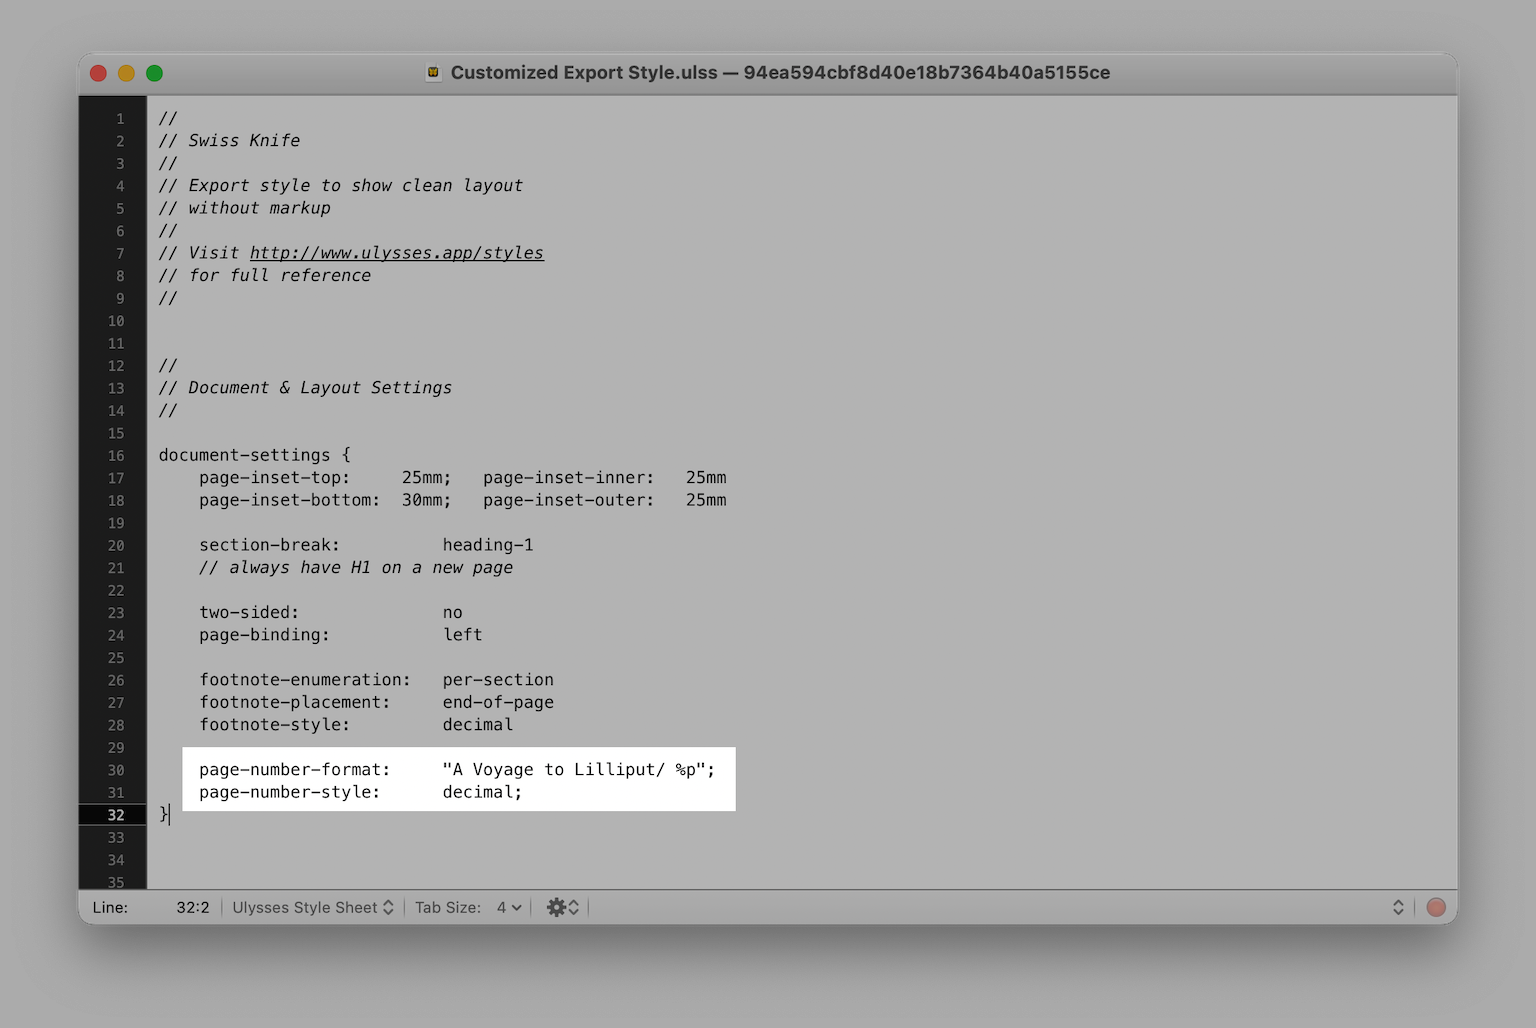
Replace the “Individual Text” placeholder with a text of your choice, e.g., the author's name and/or the book title. In case you don’t want your document to contain page numbers, delete%p.
Afterward, look for the selectorarea-footerorarea-header(depending on where you want to place the custom text) and make sure that the valuecontentis set topage-number. You can also adjust/add the valuetext-alignmentto change the alignment. Here is an example:area-header { content: page-number text-alignment: center top-spacing: 10mm bottom-spacing: 3mm }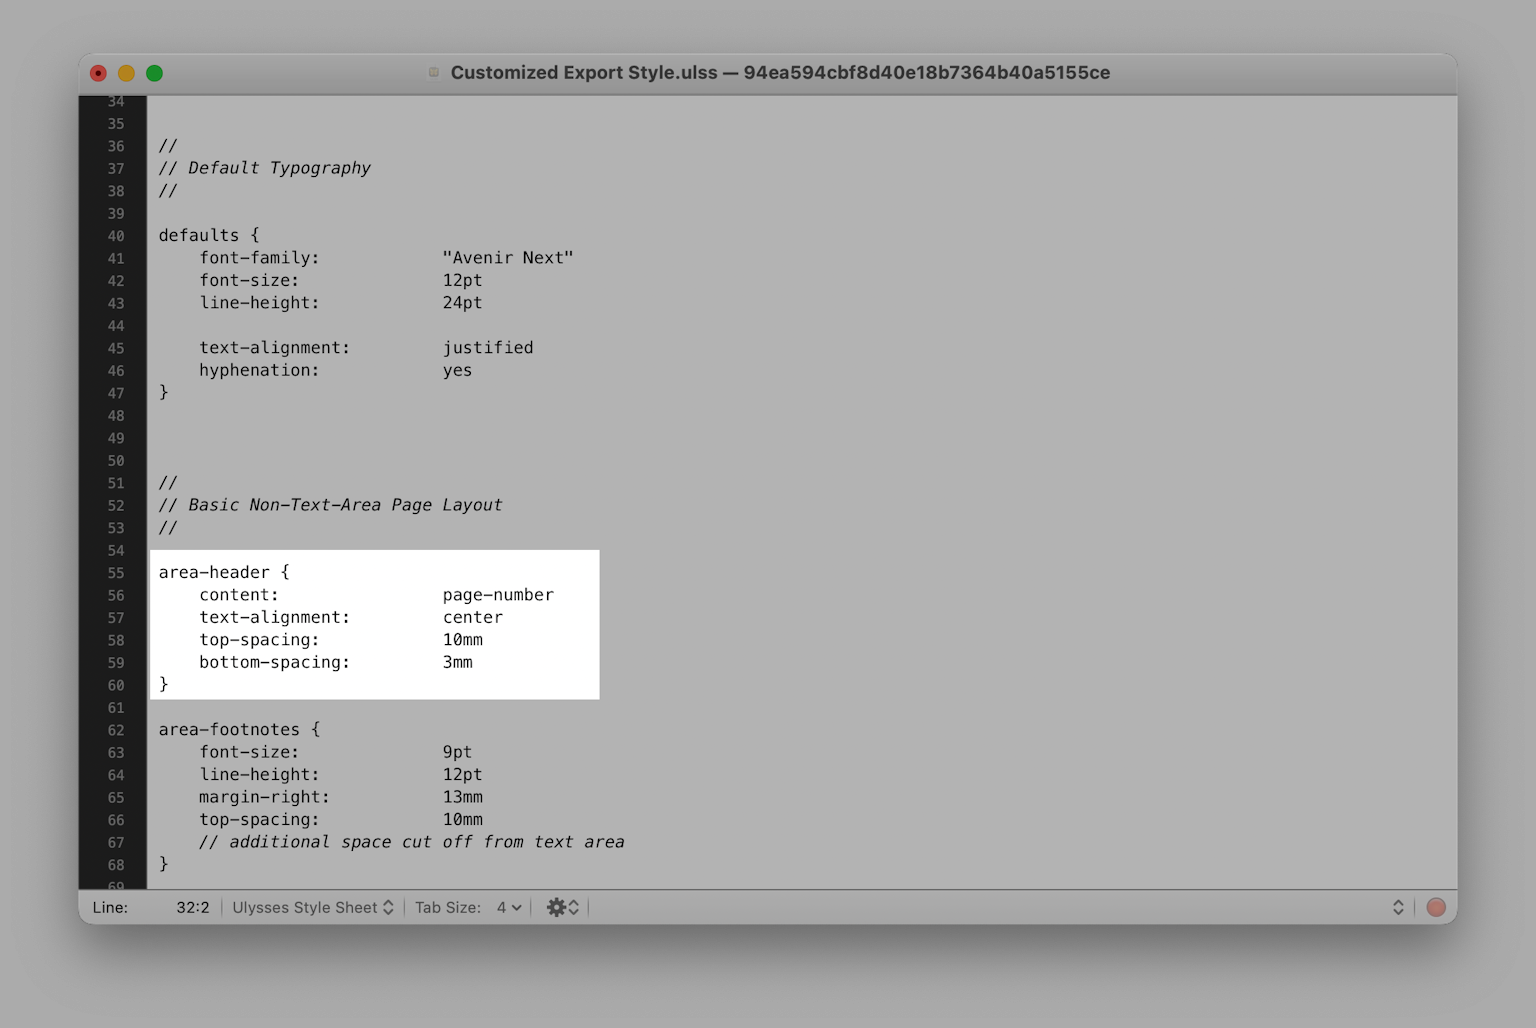
Margins Between Paragraphs
In Ulysses, excessive whitespace is disregarded or removed to comply with the Markdown specification. To increase the spacing between paragraphs, locate the selector
paragraph + paragraphand include the linesmargin-topand/ormargin-bottom. By adjusting the value formargin-topandmargin-bottom(here:2em, you can also use200%or20mm), you can adjust the spacing as desired. Here is an example:paragraph + paragraph { margin-top: 2em margin-bottom: 2em }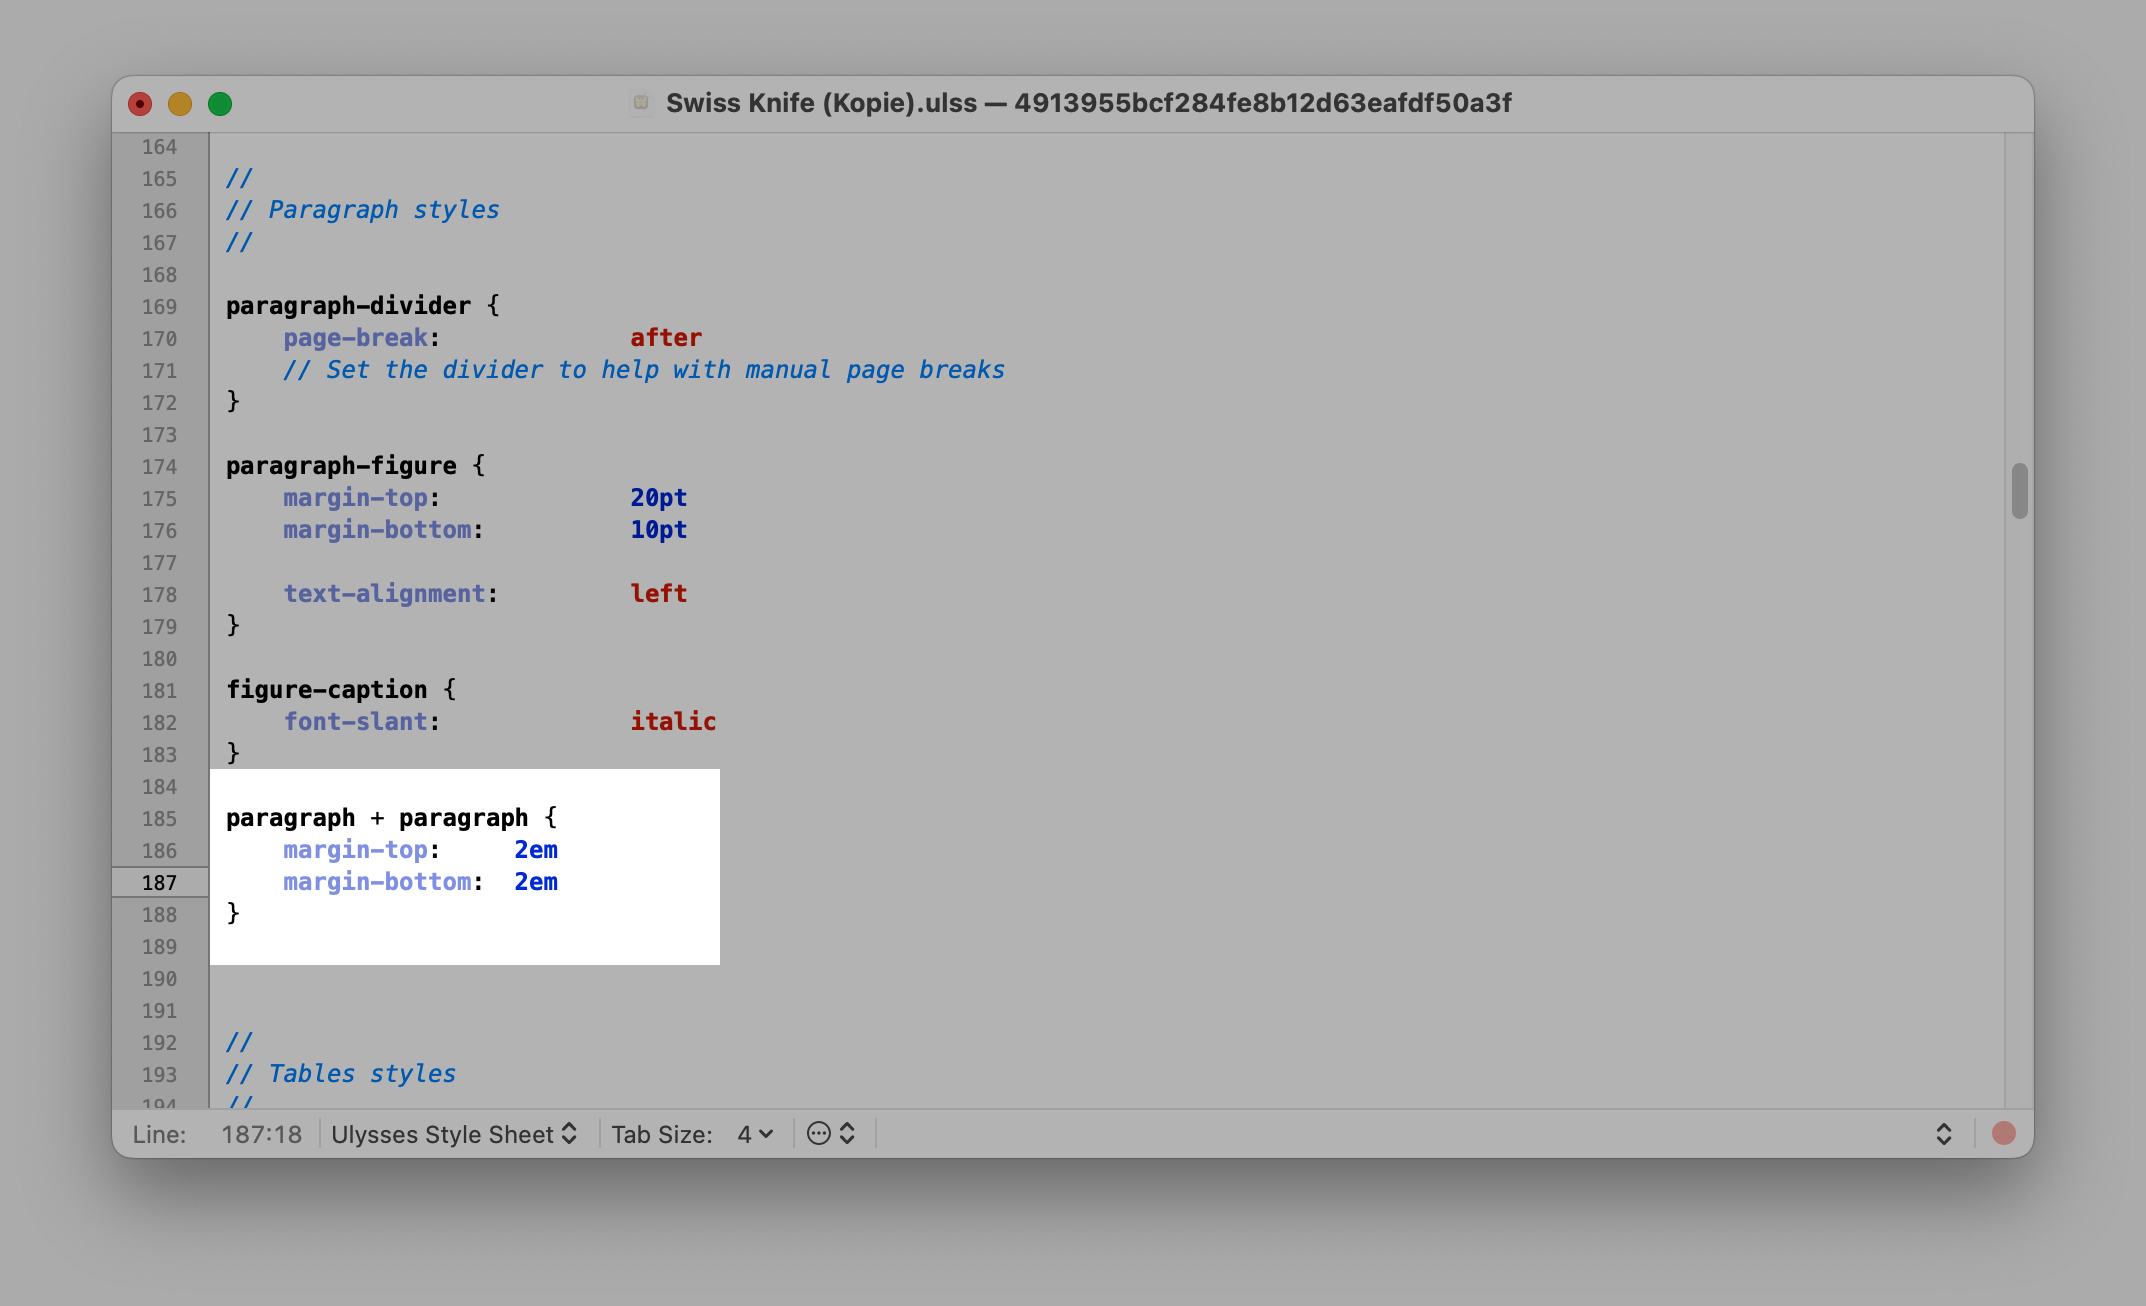
If the
paragraph + paragraphelement doesn’t already exist in the export style you’re modifying, simply include all the all the lines mentioned above under Paragraph Styles. - Save the stylesheet (optional: rename it)

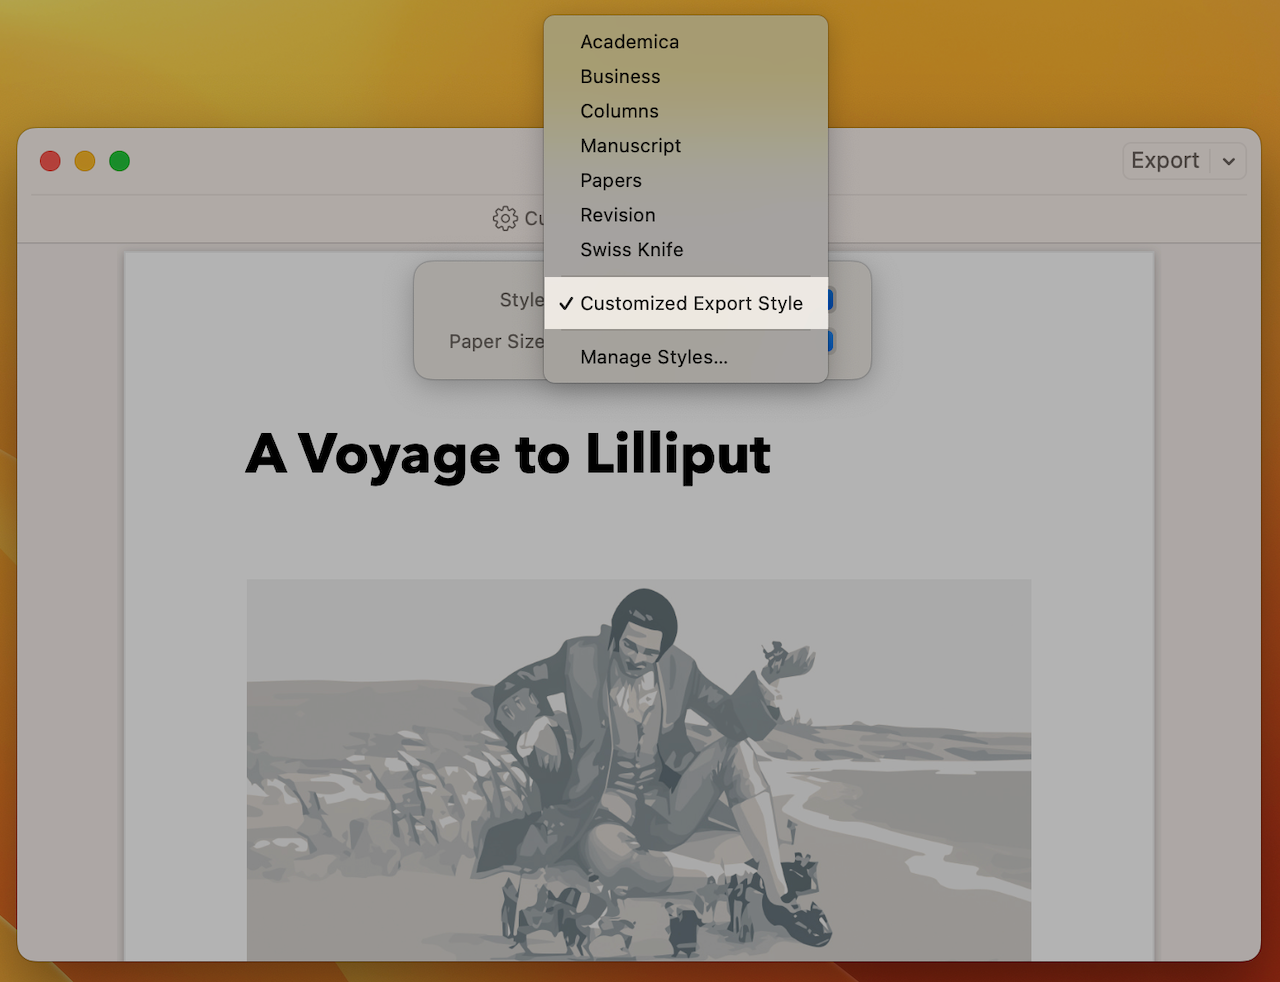
- Select your customized export style in the export preview
For more information on how to customize your PDF/DOCX document, check out the following guides: