Have you ever noticed that text looks completely different in Ulysses than in a word processing program like Word or Pages? That's because Ulysses works on a completely different level — it's a writing tool based on its own markup language: Markdown XL.
Since this difference can be overwhelming at first, especially if you've never worked with a markup-based editor before, we've created this guide.
Ulysses vs. the World (of Word Processors)
Ulysses follows the principle of "What you see is what you mean" (WYSIWYM). This means you focus more on the structure and meaning of the text while writing, using markup or styling codes to indicate formatting. The final appearance is only seen when exported.
In contrast, word processors like Word or Pages use the principle of "What you see is what you get" (WYSIWYG). This means the text appears exactly as formatted in the editor. While this might seem straightforward, it can be distracting because the focus shifts to appearance rather than content.
Simply put: In Ulysses, what you see in the editor isn't what your text looks like in the formatted document.
What Is Markdown XL?
Markdown XL is the markup language used within Ulysses, inspired by Gruber’s and Swartz’s Markdown. It consists of 27 tags and is designed to be a simple way to format text only using a keyboard. The basic principle is to use special characters, called tags, to indicate how you want your text to be formatted. For example, you can use hashtags (#) for headings or underscores (_) for emphasized words, instead of using buttons or menus like in a word processor.
What Are the Benefits of Markdown XL?
Using a markup language like Markdown XL offers several benefits:
- Efficiency: The 27 tags serve as shortcuts, making it easy to style your writing without complex tools. Because you can format your text without leaving the keyboard, typing is faster.
- Consistency: Your computer understands the tags perfectly, ensuring your writing is styled as intended. This allows you to focus solely on writing without worrying about appearance in the editor. The final document's look is controlled by the export style, ensuring consistency if the tags are used correctly. This eliminates the need to format while writing, which can hinder productivity.
- Versatility: With different export styles, your text can seamlessly adapt to various formats such as PDFs, ePubs, or WordPress blogs. You can even customize your export style, defining each tag's appearance to suit your preferences. For example, you could style emphasized text in red instead of italic, or both.
- Learnability: With only 27 tags, Markdown XL is easy to learn and understand, allowing you to quickly grasp the language and start using it effectively.
How Do I Use Markdown XL?
To use Ulysses like a pro, you'd learn and type the 27 tags. If you can touch type, this is also the fastest method.
Download the cheat sheet here.
Similar to the many roads to Rome, Ulysses offers various ways to tag your text if you don't feel like learning the tags.
Mac
There are four additional approaches on Mac:
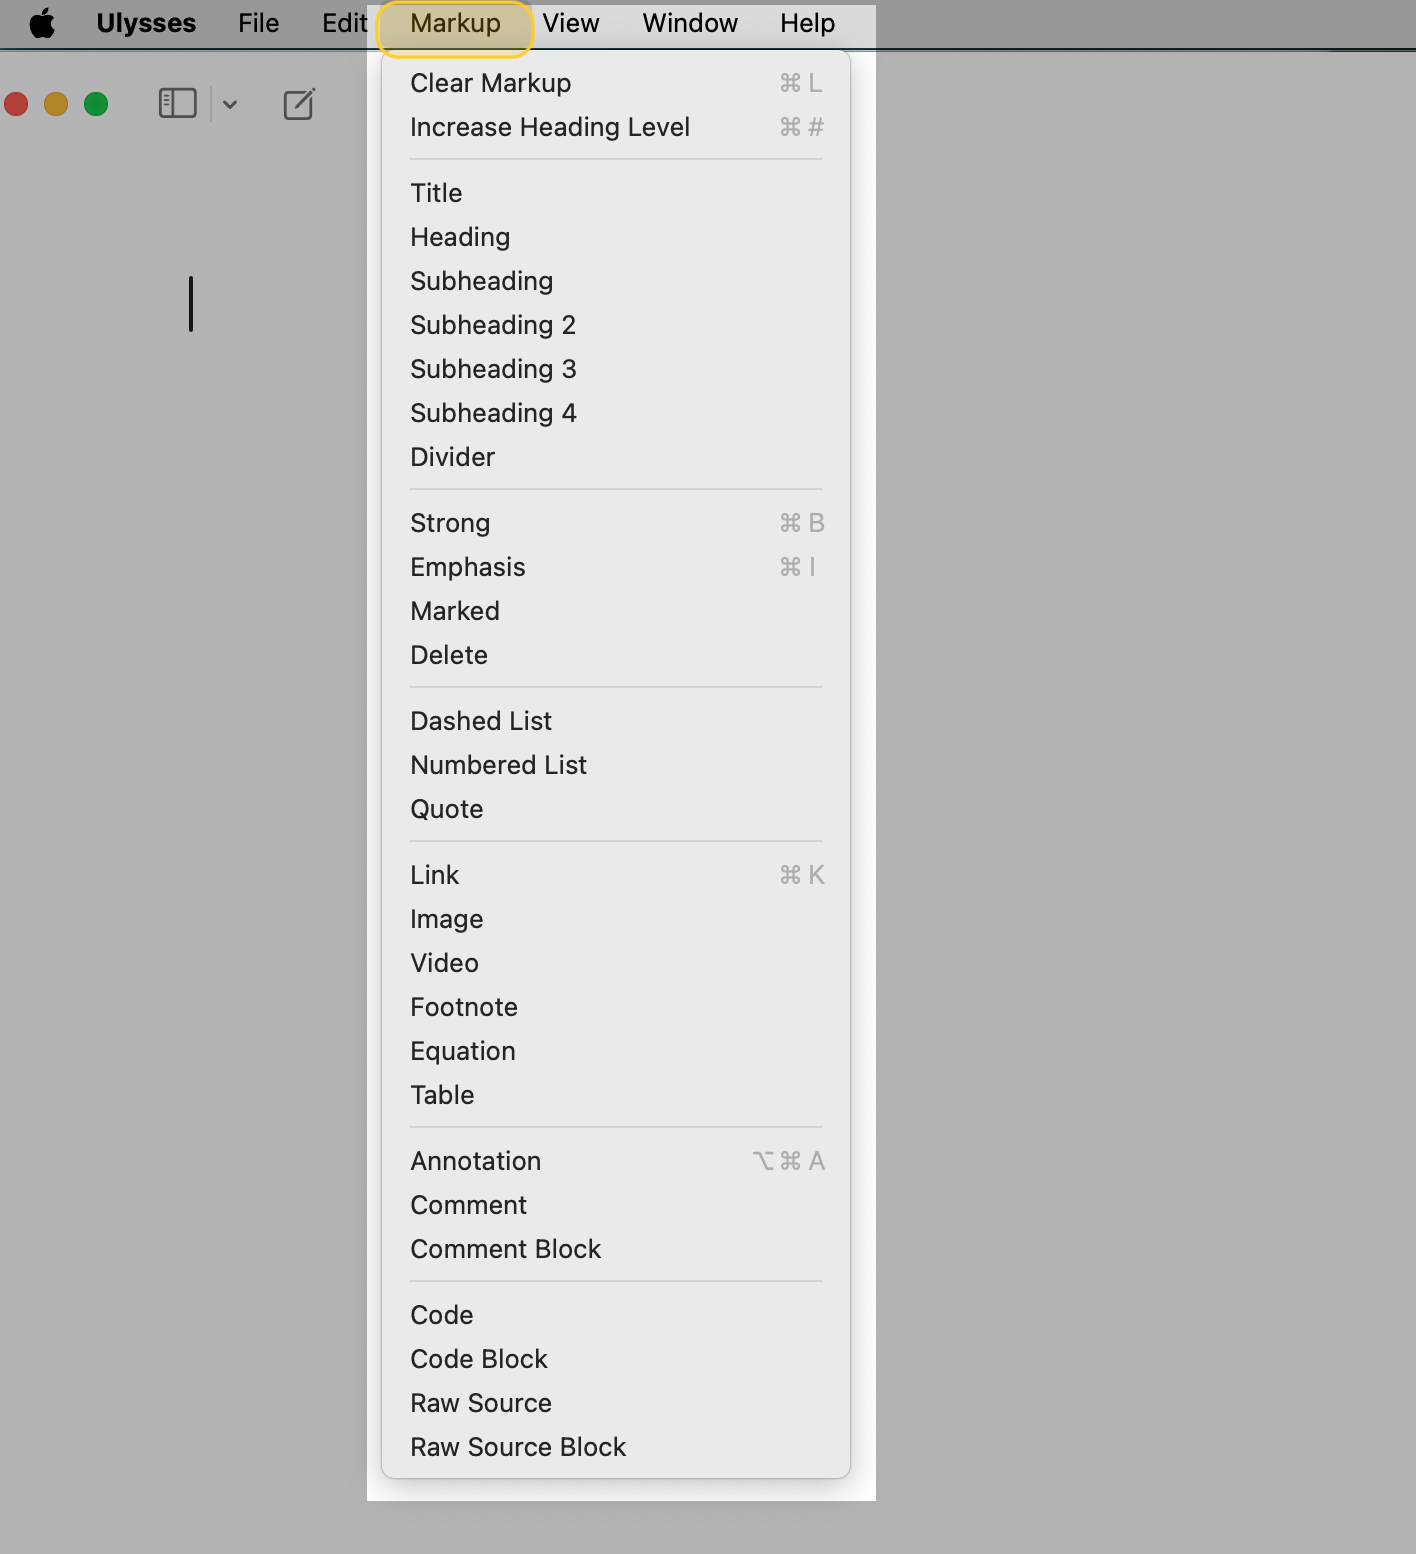
1. Navigation Menu
In the navigation menu, you can find all available tags under Markup. Just select the text you want to tag, and then apply the appropriate tag.
2. Markup Bar
Ulysses also features a Markup Bar, which is enabled by default and located at the bottom of your editor. You can choose tags there using your mouse or touchpad.
The Markup Bar initially shows three tags. To view more, simply click the ellipsis. It's context-sensitive, displaying different tags based on what's most likely needed in a specific context.
To disable the Markup Bar, go to View › Markup Bar in the navigation menu and select Off.
3. Command-9
To access the markup tags within the editor, just type ⌘9. Then, you can choose tags from a list using your mouse or touchpad. The markup tags will disappear after they’ve been selected.
4. Keyboard Shortcuts
We've already set up keyboard shortcuts for three common tags, ensuring consistency across actions system-wide:
- ⌘B for strong text
- ⌘I to emphasize the text
- ⌘K to create a link
Additionally, you can customize keyboard shortcuts for each tag. Check out our FAQ article for step-by-step instructions: How Do I Create a Custom Keyboard Shortcut?
iPad/iPhone
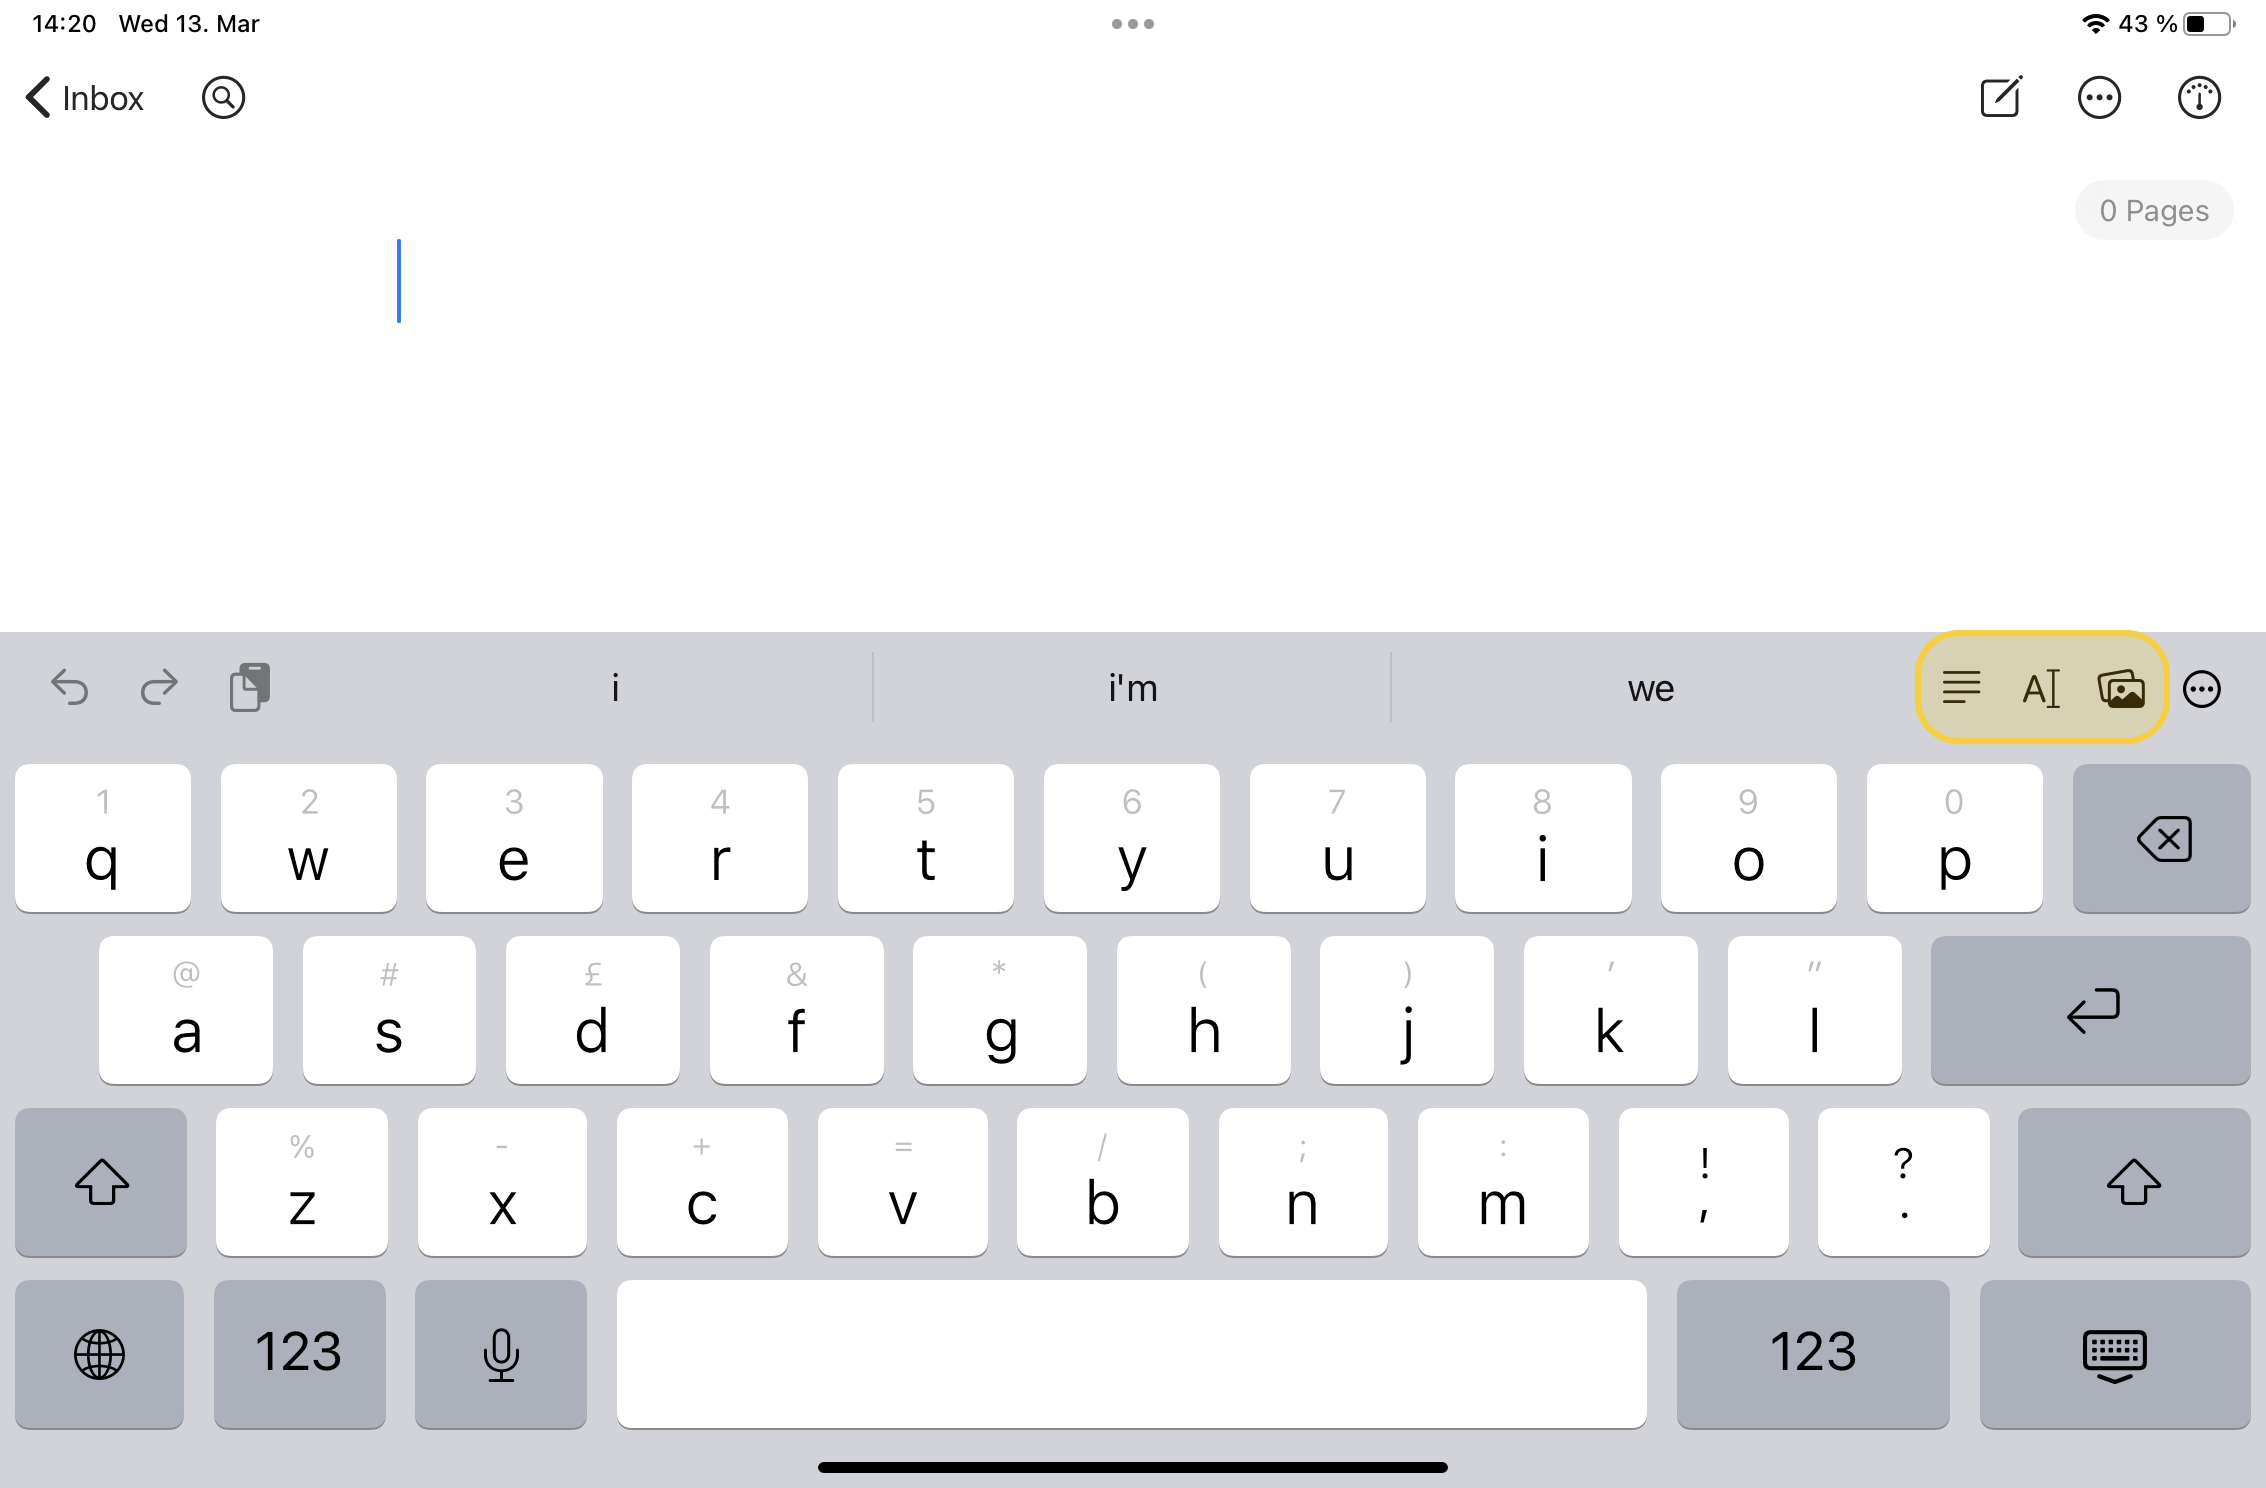
On iOS and iPadOS devices, you can use the keyboard bar to access markup tags. Each of the three buttons on the keyboard bar corresponds to a specific purpose, such as formatting paragraphs, formatting text or inserting elements.
How Do I Format My Text?
Not all of our 27 tags are equally in demand — at least not for the average author. To make it easier to get started with Markdown XL, you should first master the most common markup tags. Here are the most important tags for normal text formatting:
Headings
You can use up to six hashtags in a row to distinguish between #Title, ##Heading, and ###Subheadings.
When you're in a heading, you can simply increase its level with ⌘#. To decrease it, press ⇧⌘#.
Strong (Bold)
For a strong statement, simply place your text between two double asterisks.
**This text is strong.**Emphasize (Italics)
Wrap your text in underscores to emphasize it.
_This text is emphasized._Lists
To create a dashed and numbered list simply type dashes or numbers at the beginning of a line. They will automatically continue, if “Smart Lists” are enabled in the Edit menu (Mac) and the Editor Settings (iPad/iPhone) under Substitutions.
And just like that, you've already mastered the 10 most common tags of Markdown XL.
How Do I Create Footnotes?
A footnote is an additional piece of information or a reference found at the bottom of a page, usually marked by a superscript number or symbol in the main text. Footnotes are often used to provide explanations, citations, or comments related to specific parts of the text.
To create a footnote in Ulysses, simply type (fn). This will bring up a text field where you can enter your footnote. All footnotes will be automatically numbered upon export. To edit an existing footnote, double-click (Mac) or tap (iPad/iPhone) the footnote place holder in the editor. This will open the text field for editing.
To easily find or view your footnotes, you can use the Overview pane of your Dashboard.
How Do I Create Links?
To create a link in Ulysses, simply enclose text in [square brackets]. This will prompt a text field where you can enter your link's URL. To edit an existing link, double-click (Mac) or tap (iPad/iPhone) the linked text to open the text field for editing.
If you want the link's URL to be visible, paste it directly into the editor. Ulysses will automatically recognize it as a link and format it accordingly, ensuring it's clickable upon export.
To easily find or view links, you can use the Overview pane of your Dashboard.
Where Did All My Whitespace Go?
Simply put: If it's not a tag, it won't affect formatting. This includes using empty lines (pressed with ⏎) or indents (pressed with ⇥). Ulysses follows Markdown rules and ignores extra spaces.
But what if you really, really need more whitespace?
Consider if it is a systematic whitespace. If you're looking, for example, for extra space between paragraphs, you can adjust your export style to accommodate this. Learn how to customize the appearance of your exported document here: How to Customize Ulysses
For occasional white space, you can use "protected whitespace," which won't be converted and will be retained on export. To do this, press ⎇ ␣ (alt/option-space) and the whitespace will be preserved.
Poets should also be aware of how to create a line break in Ulysses: How Do I Create a Line Break?
Please remember: Ulysses isn't designed for manual formatting, and that's not where it excels. Let's not force it to perform tasks for which it is not intended!
Markup Blues? Go Minimalist!
While many users enjoy writing with Markdown XL tags fully visible, some find them bothersome. Currently, completely hiding markup tags in the editor isn't an option, but there are choices available for a visually minimalistic writing experience. For instance, you can try the Editor Themes Barely There or No Tags. Alternatively, you can create your own Editor Theme.
Writer’s Special
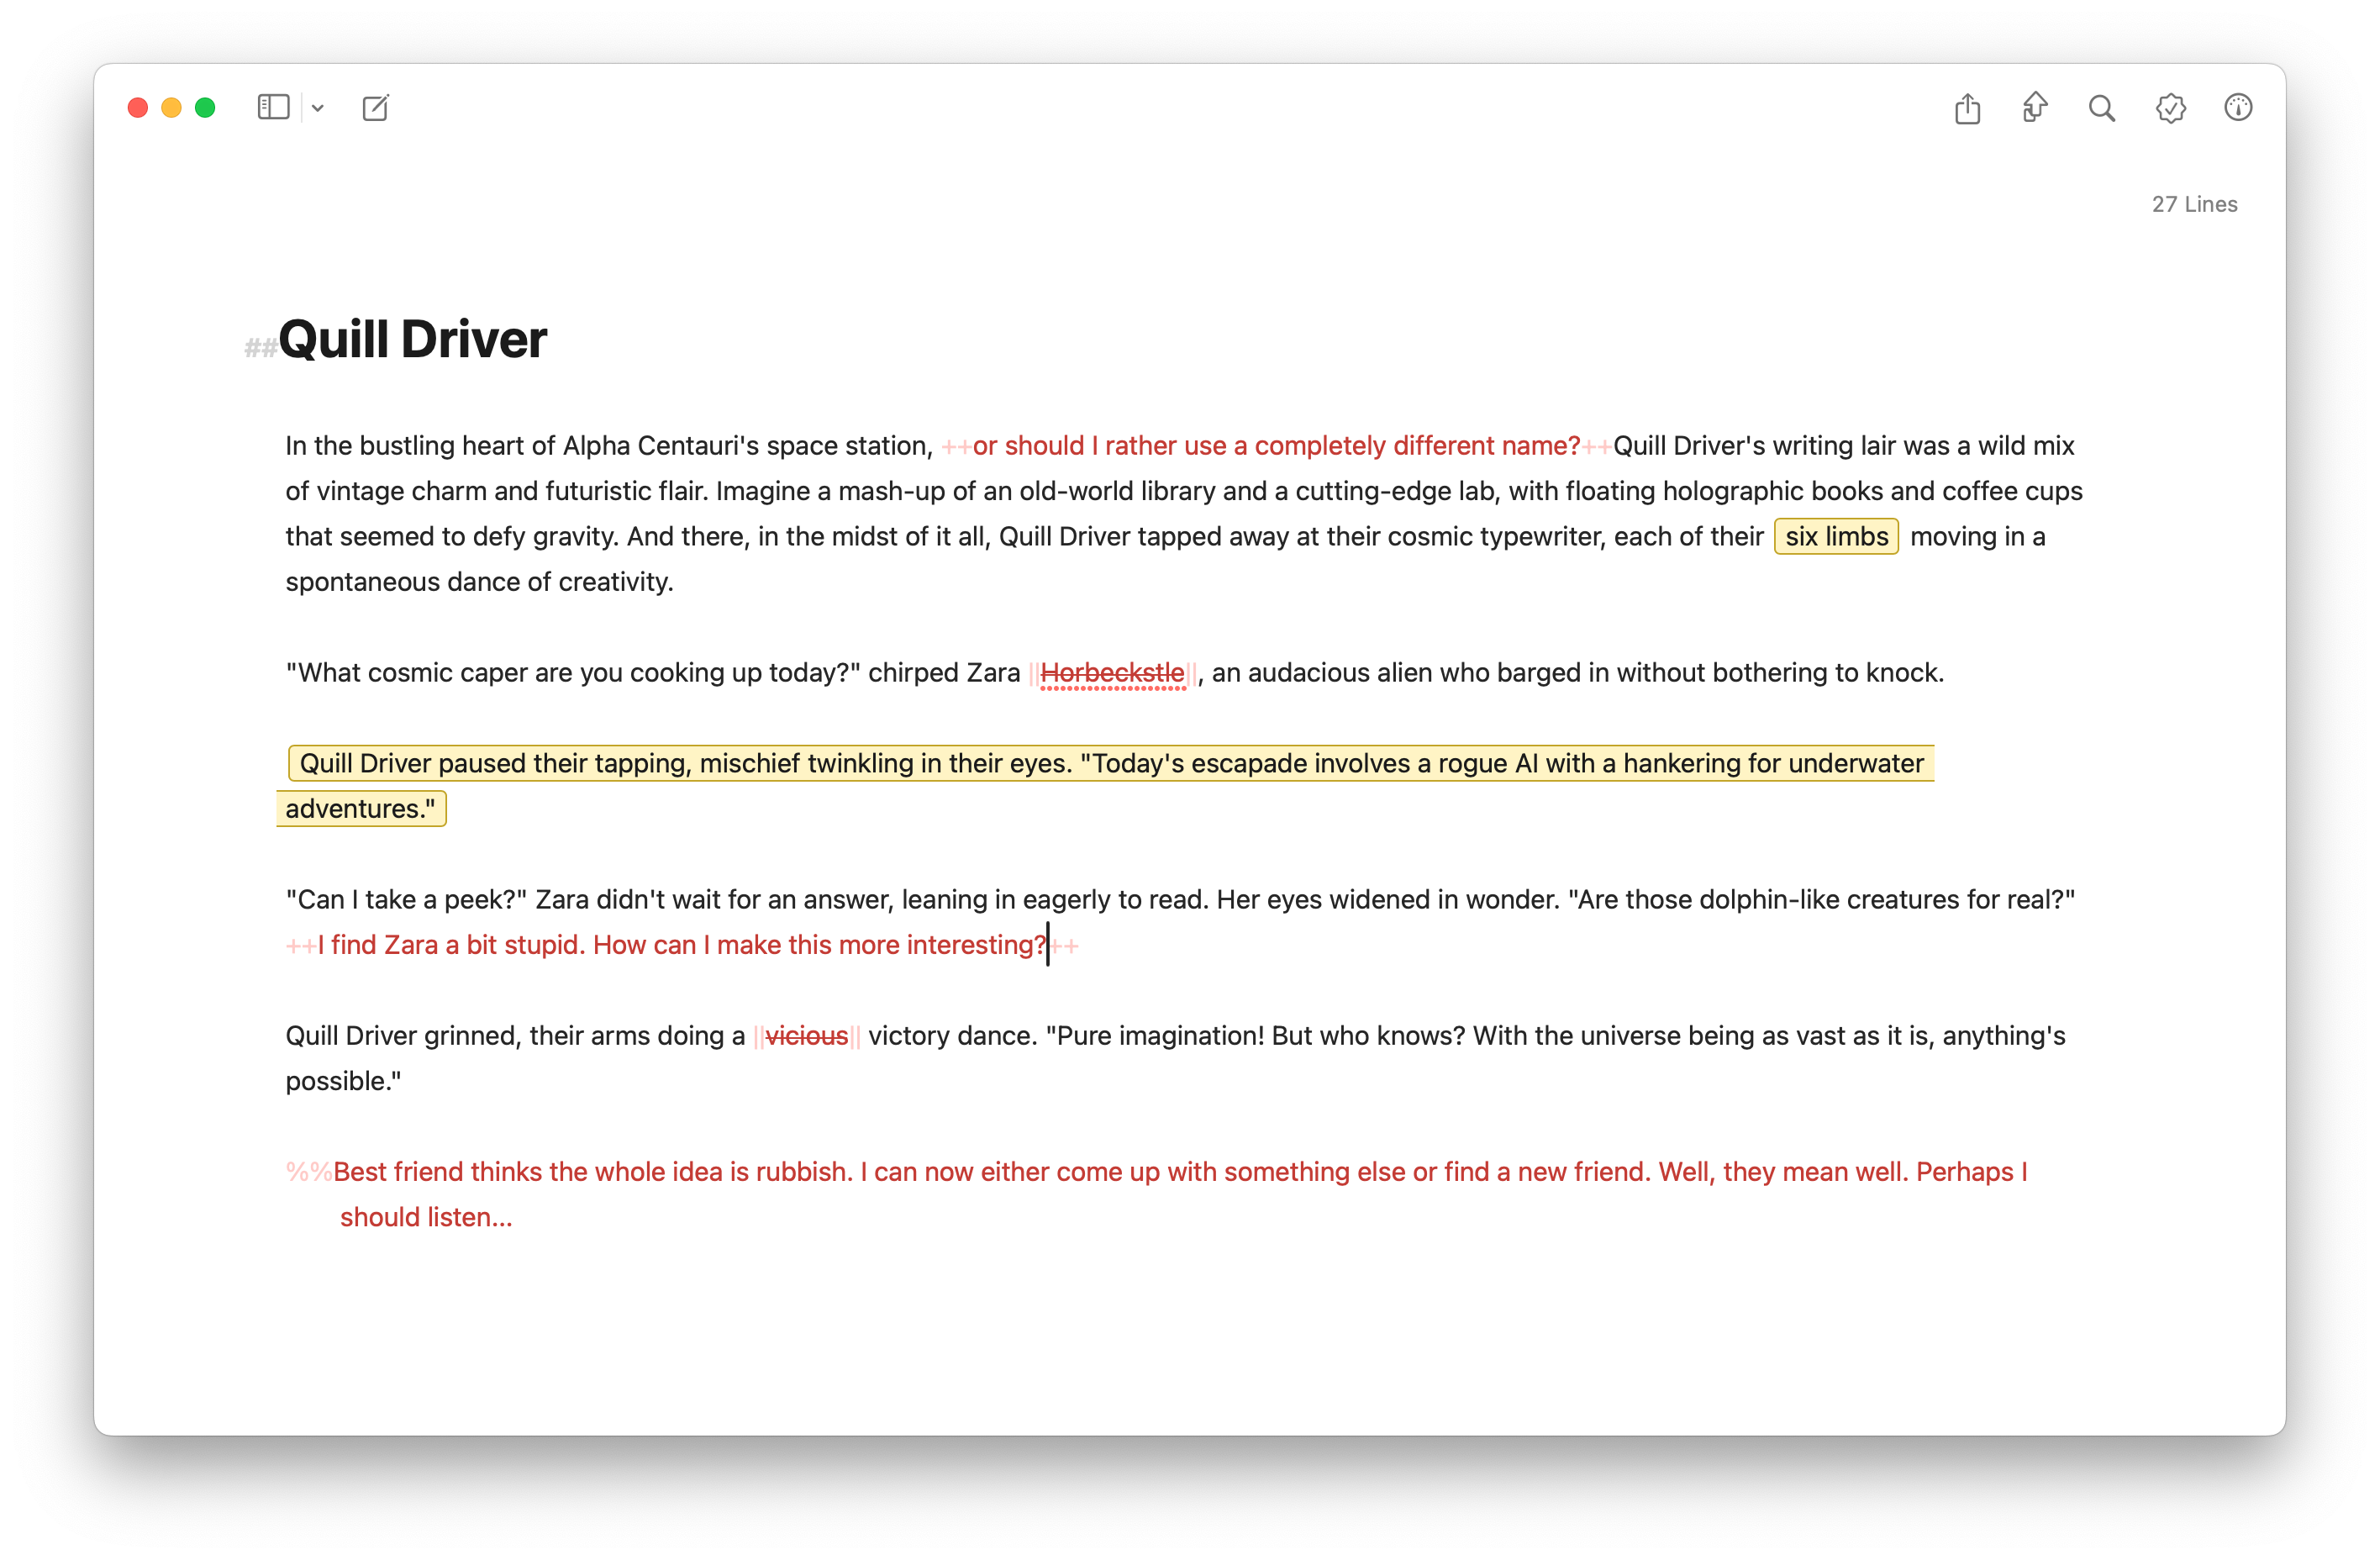
As a writer, you often write text that isn't meant for the public eye. With Ulysses, there's no need to delete such text from your document. That's where special tags for excluded text come into play. They allow you to view your work in progress without deleting any text prematurely.
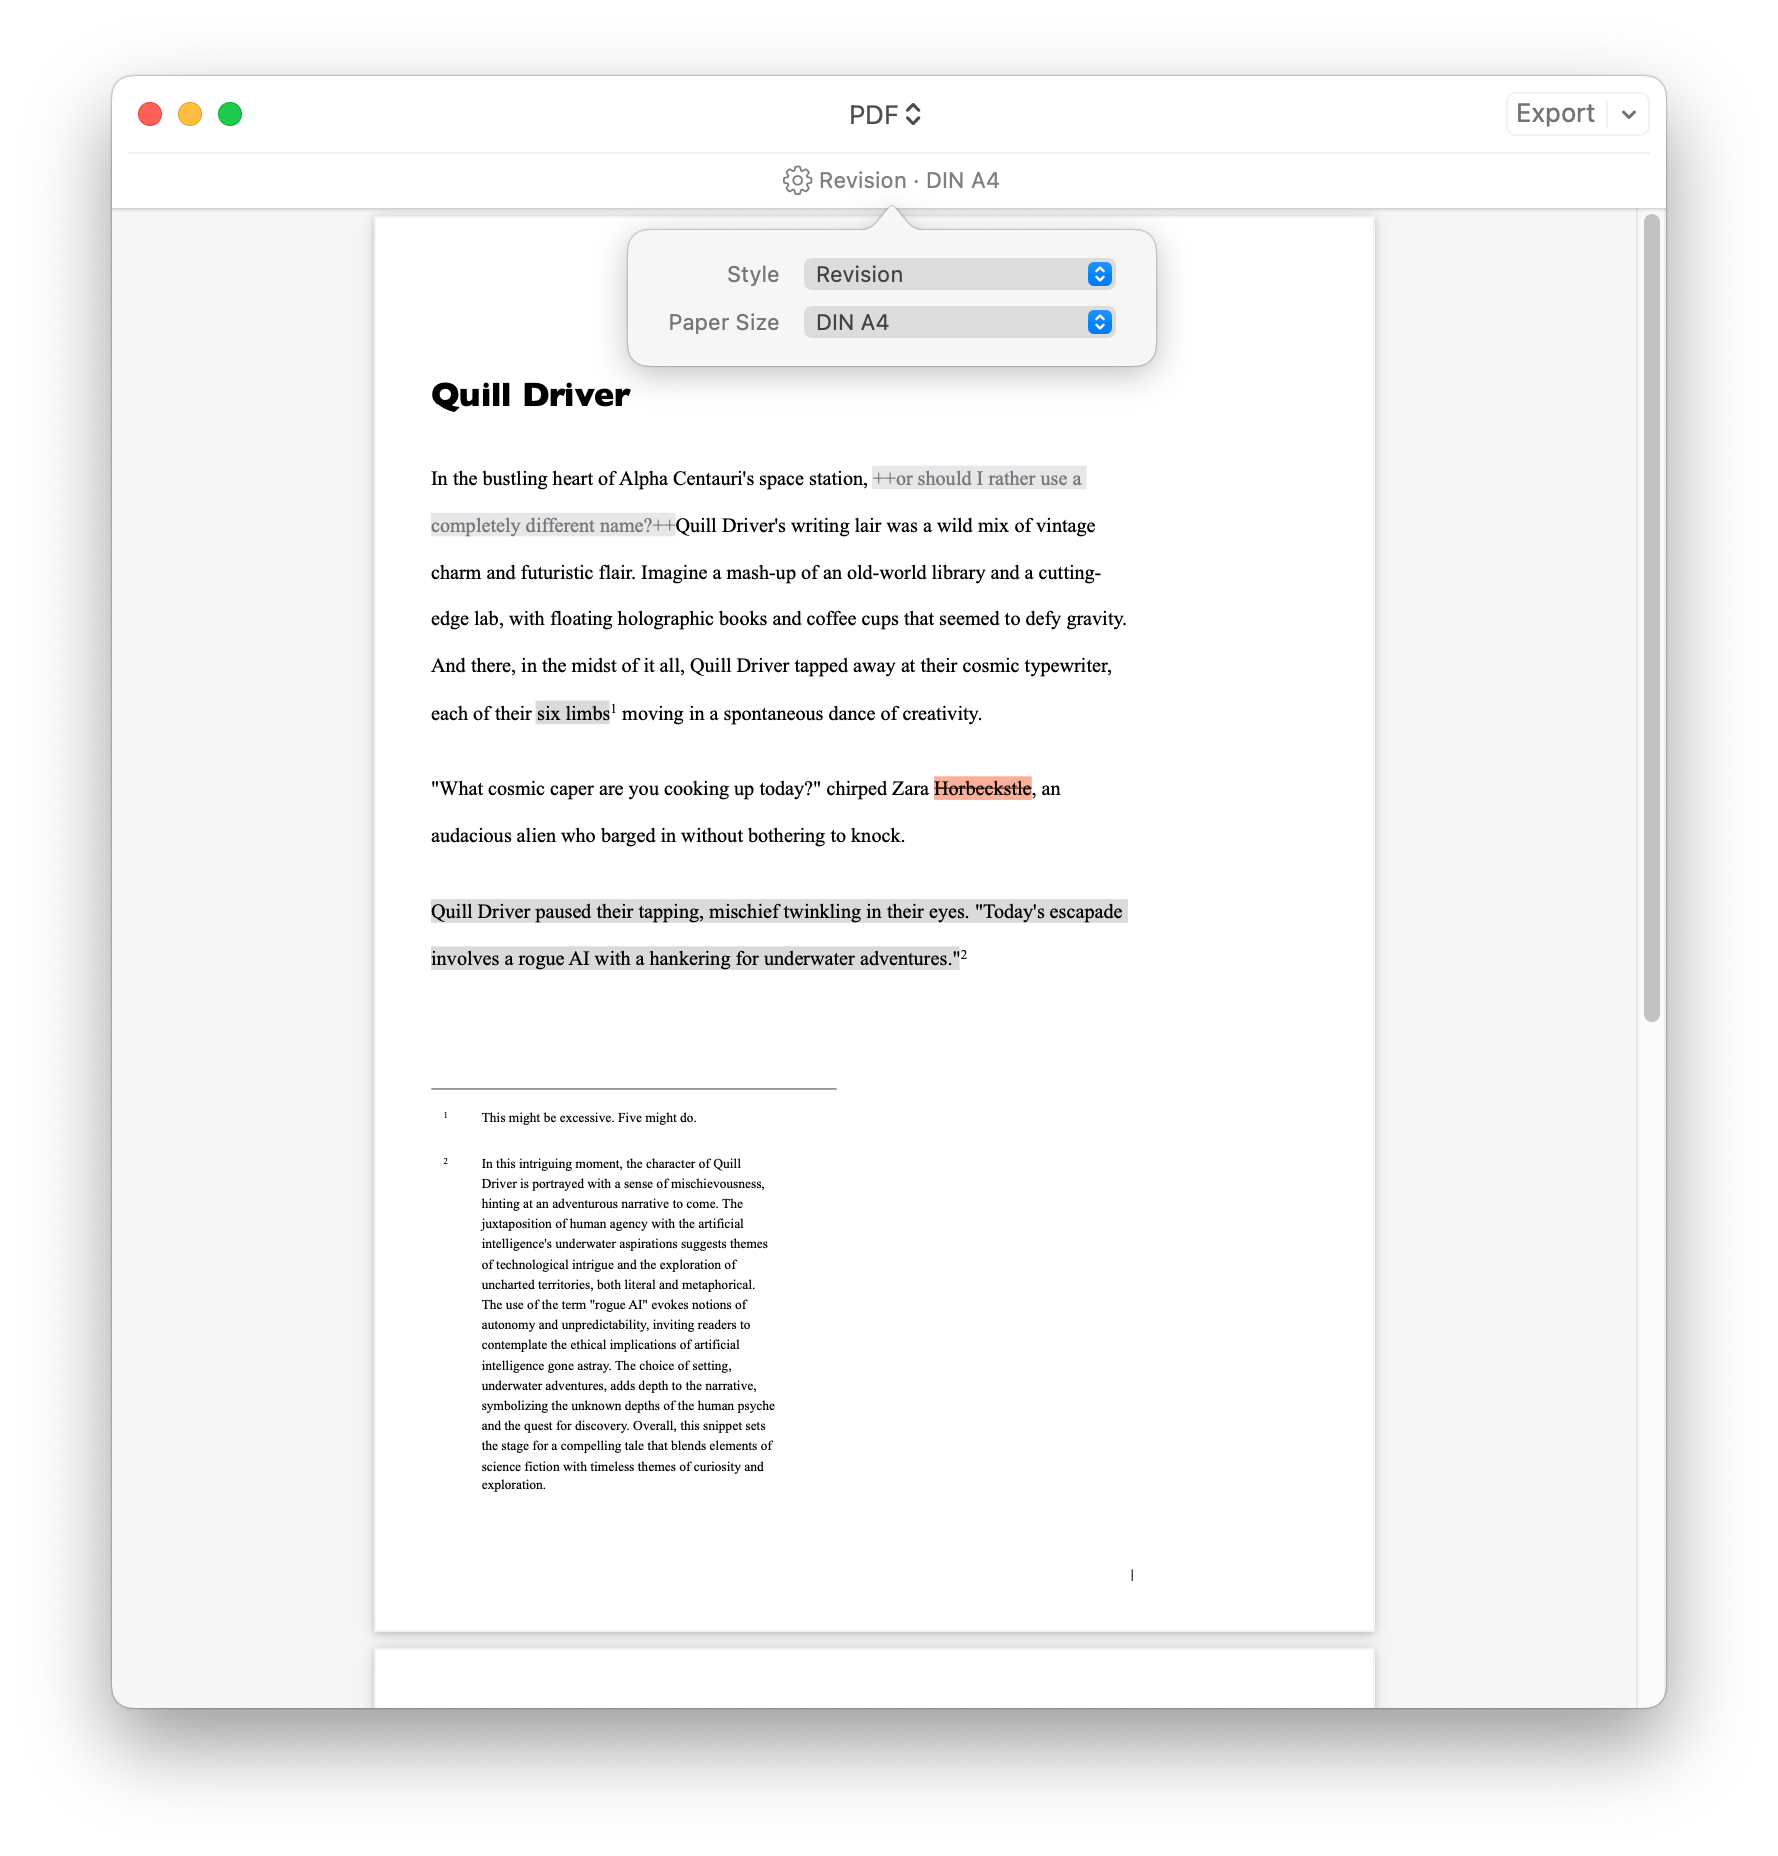
Most export styles will automatically exclude these editorial tags from being exported. However, we've got a special export style called "Revision" that includes all those tags.
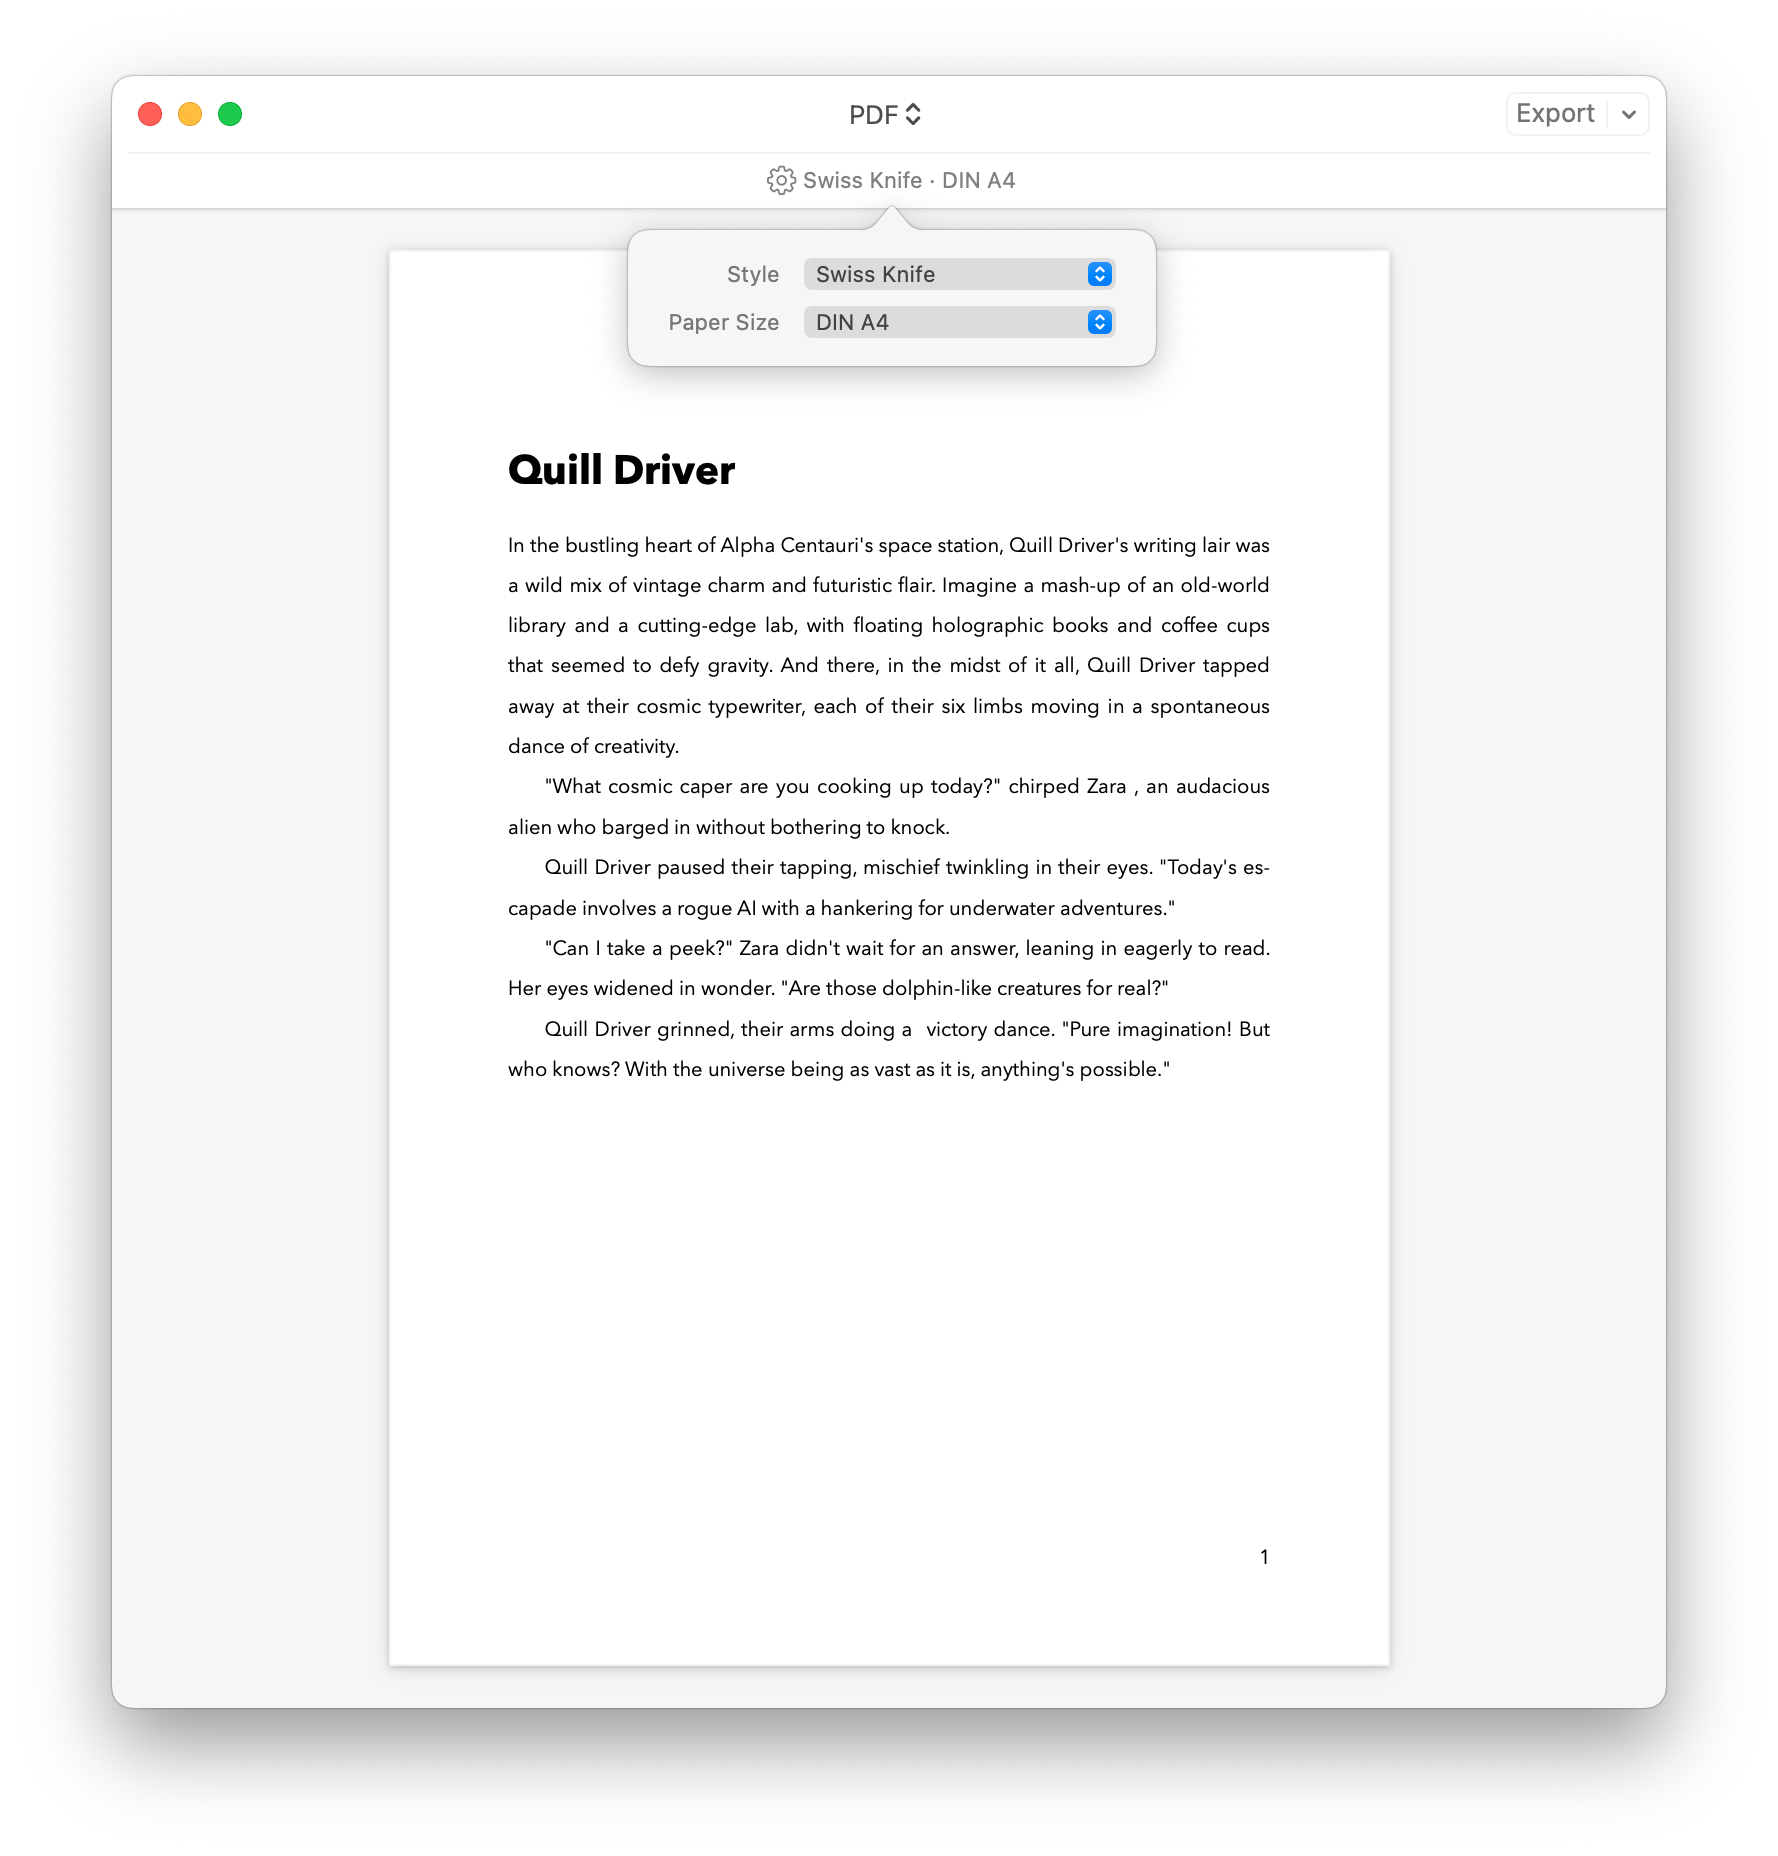
The beauty of Markdown XL is that the same text will look quite differently if you export it as a final document or revision document:
Comments
You can create an inline comment by wrapping text in double plus signs: ++for my eyes only++. Alternatively, you can create entire comment blocks by prefixing a paragraph with double percentage signs:
%%Please don’t show this to anyone!Deletions
If you decide that text should be struck from the exported document, simply enclose it with double pipes, like this: ||delete||.
Annotations
An annotation is a note or comment added to a text, usually for clarification, interpretation, or analysis. Annotations can appear directly in the text margins, within the body of the text, or in a separate section altogether. Unlike footnotes, annotations are often more extensive and can include personal reflections, insights, or critical analysis by the author or reader.
To create an annotation in Ulysses, simply wrap the annotated text in {curly brackets}. This will bring up a text field where you can enter your annotation. All annotations will be automatically numbered upon export. To edit an existing annotation, double-click (Mac) or tap (iPad/iPhone) the annotated text. This will open the text field for editing.
To easily find or view your annotations, you can use the Overview pane of your Dashboard.
Geek’s Special
Some tags are specifically created for coders: There’s markup to add sample code or raw source code. The former is essential for writing technical documentation, and the latter is really advanced stuff that lets you add code that runs on export.
You can also insert whole paragraphs of both code variants by starting a paragraph with a double tick (code block) or double tilde (raw source block).
'inline code'
''code block
~raw source code~
~~raw source block~
For more information, check out the following guides:
Hide Markup
While the option to hide markup in the editor isn't currently available, we offer several themes with minimal tag visibility on our Styles & Themes website. For your needs, we recommend the "Barely There" theme. Alternatively, you can create your own custom editor theme using the "Editor Themes" tutorial.
Help! Markdown XL Isn’t Working!
While Markdown XL is typically enabled by default, there are some important points to consider:
- External Folder Usage: When operating in External Folders, Ulysses offers a choice between Markdown and Ulysses' proprietary file format. By default, Markdown is chosen to ensure broad compatibility across applications. However, if you opt for Markdown files, there are a few limitations to be aware of. Notably, Markdown XL tags such as Comments, Annotations, and Delete are unavailable.
-
Markup Preferences: Ulysses allows you to select your preferred Markup language. In addition to Markdown XL, you can opt for Markdown, Minimark, or Textil'd. Furthermore, customization of your Markup is possible. Any conversion of a sheet to a different Markup language, whether in iCloud, On My Mac/iPad/iPhone, or Projects, will be retained by Ulysses. Subsequently, all new sheets will be created in the chosen Markup language, while previously created sheets will maintain their original settings.
In these scenarios, to activate Markdown XL functionality, you'll need to enable it under Edit › Convert Markup (on Mac) or in Editor Settings › Markup (on iOS).