
Speed Up Your Ulysses Workflows: Shortcuts
Are you a productivity enthusiast, eager to reduce the time you lose with routine tasks? Then you should have a look at Apple’s Shortcuts app. It lets you combine actions from many different apps into a single shortcut, accessible via your iPhone’s home screen, your Mac’s menu bar, or with a Siri voice command.
The Shortcuts App
The Shortcuts app is available for iOS/iPadOS and, since macOS Monterey, also for Mac. It is preinstalled on all devices running iOS 12.0 or macOS 12 (or later).
Each shortcut consists of multiple actions. There’s a gallery where you will find a collection of pre-made shortcuts for many different purposes. In the “All Shortcuts” view, you can create and collect your own shortcuts.
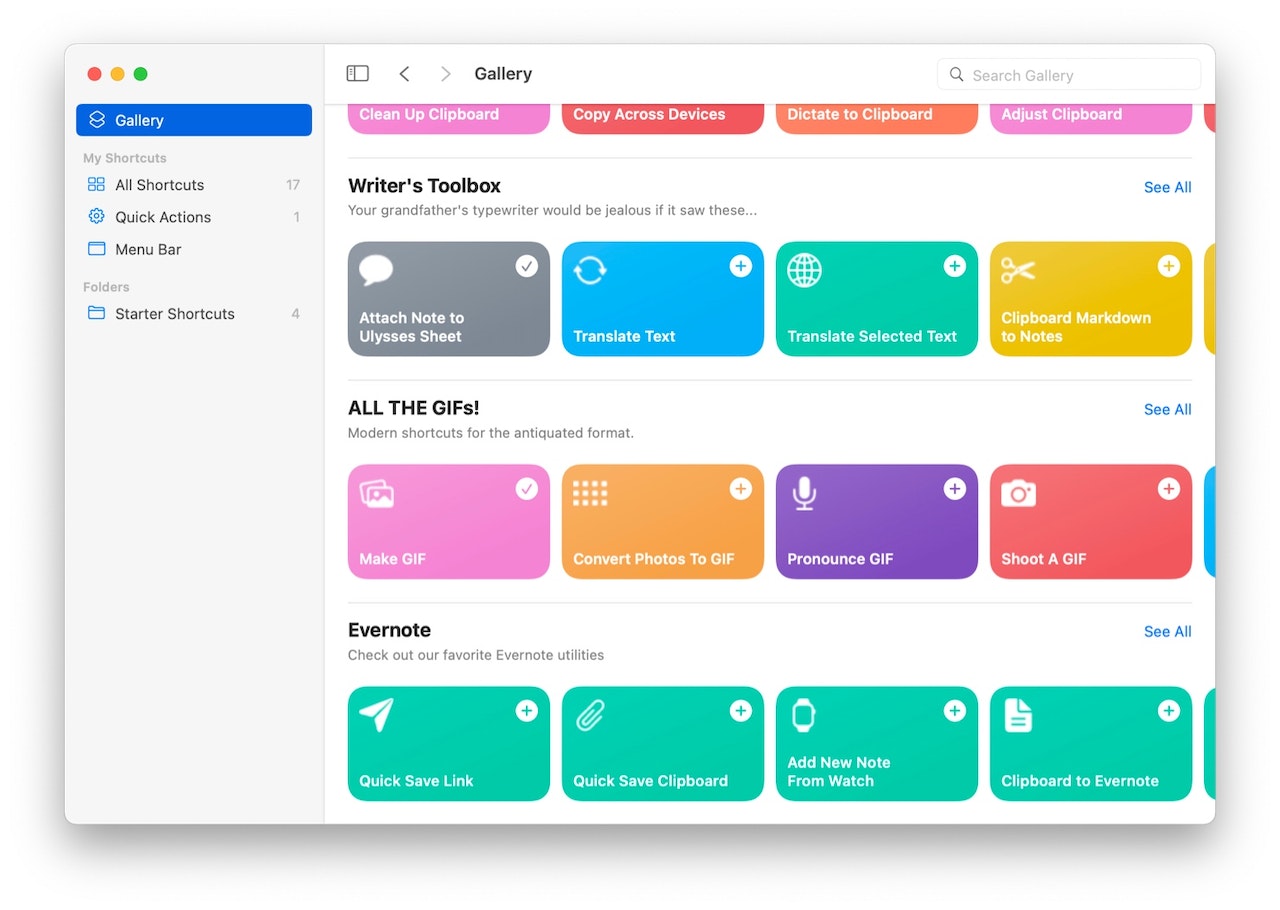
If you browse the Gallery and find a shortcut that seems useful, you can adjust it to make it work for you. There are currently two Ulysses shortcuts available in the Gallery. You can find them in the “Writer's Toolbox” shortcut collection:
- “Append to Ulysses sheet”: This shortcut takes the text on the clipboard and pastes it at the end of a given Ulysses sheet.
- “Attach Note to Ulysses sheet”: This shortcut will take a text snippet or image from the clipboard and add it as a note attachment to a specific Ulysses sheet.
Custom Shortcuts
The great thing about Shortcuts is that you’re not limited to the existing shortcuts. You can also create your own shortcuts tailored explicitly to the actions you perform with your device. For this purpose, you can combine different actions from different apps into one sequence. According to Apple, more than 300 actions are available from various apps, including several Ulysses actions.
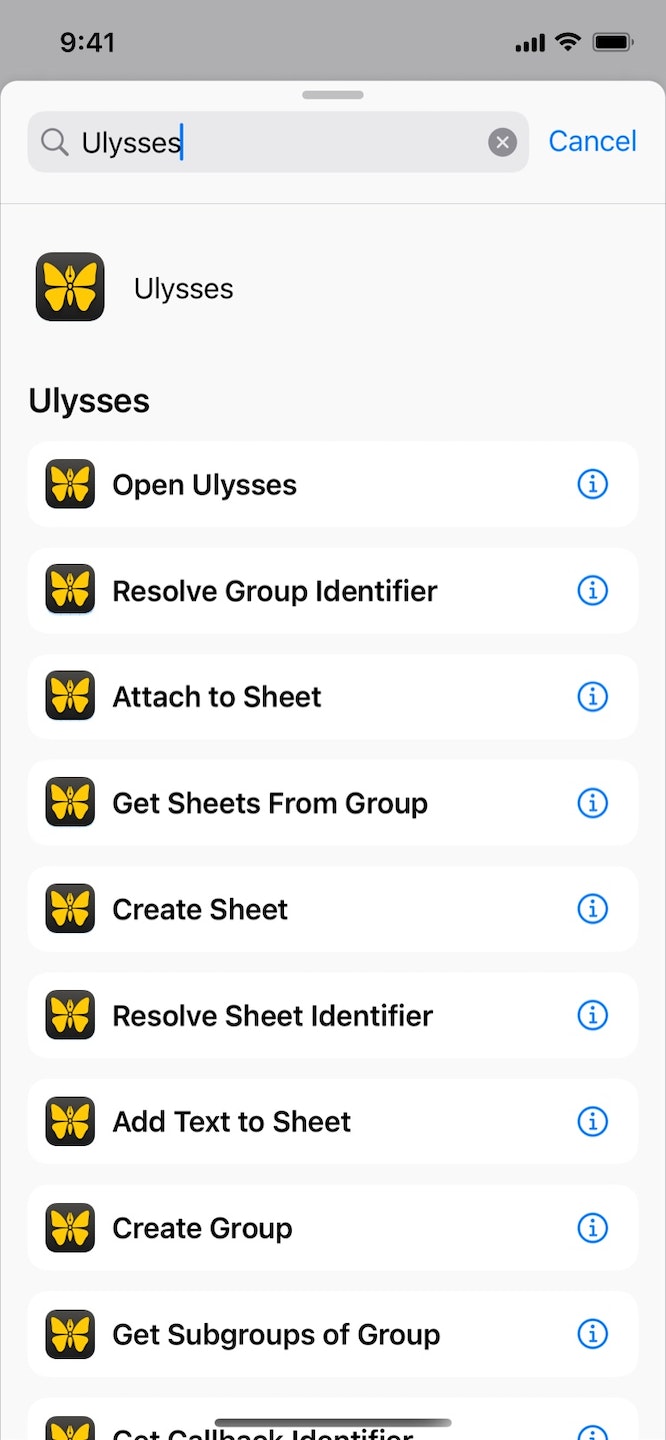
When you create your custom shortcut, you can find them by searching for the term “Ulysses” in the action list.
The possibilities are endless, and you can create shortcuts that fit your workflow the best. For beginners, we'll walk you through creating a sample shortcut.
Create a Shortcut
Let’s assume you keep a diary in Ulysses, and each day you answer a set of predetermined questions. A Ulysses group represents your diary, and each day you create a new sheet in that group. At the top of each entry, you’d like to include the current date and location.
Your new shortcut should do all of the following for you:
- When executed, the shortcut opens Ulysses and navigates to the journal group.
- A new sheet is created in the group, containing the current date and location and your chosen questions.
On Mac
Open the Shortcuts app and click the + button to create a new shortcut.

On the right side of the screen, you will see a list of suggested actions. Click the search box to browse the available actions per app or enter a search term. For more information about each action, tap the info button on the right side.

Now click or drag an action to add it to your shortcut. In the Shortcuts editor, you can customize the actions as needed and change their order using drag and drop. For the shortcut from our example, add the following actions in the following order:
- Date, which passes the specified date and time to the next action. In our case, that’s the Current Date.
- Get Current Location, which gets the current location of the device.
- Text, which passes the specified input to the following action. In the Shortcuts editor, click in the Text action, then right-click and choose “Insert Variable”. Now select “Date” and “Current Location” to add them to the Text action. Double-click on “Date” and “Current Location” to specify how detailed you want them to be. For our example, the date (long format) and the city as the location are sufficient, but the time is unnecessary. Also, enter the questions you want to ask yourself while writing the diary into the Text action.
- Create Sheet, which creates a new sheet in Ulysses. Click on Content, then right-click and select the Text action. Now click on Group and choose the group in which the new sheet should be created.
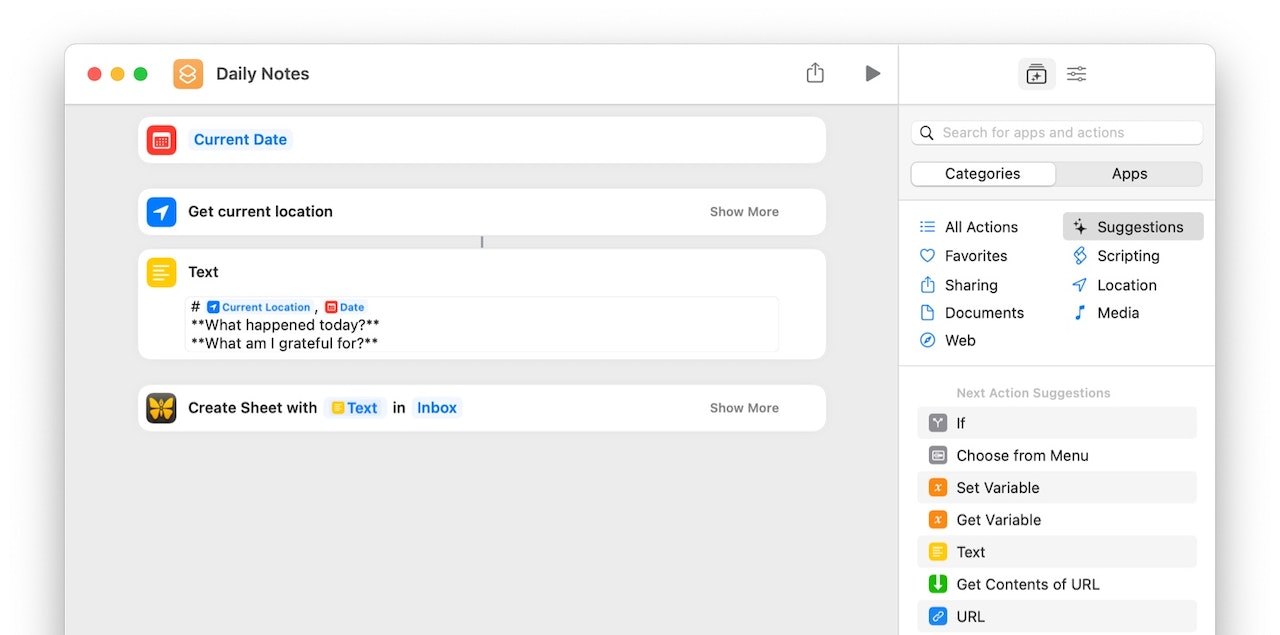
To test your new shortcut, click the Run button at the top of the Shortcuts editor.

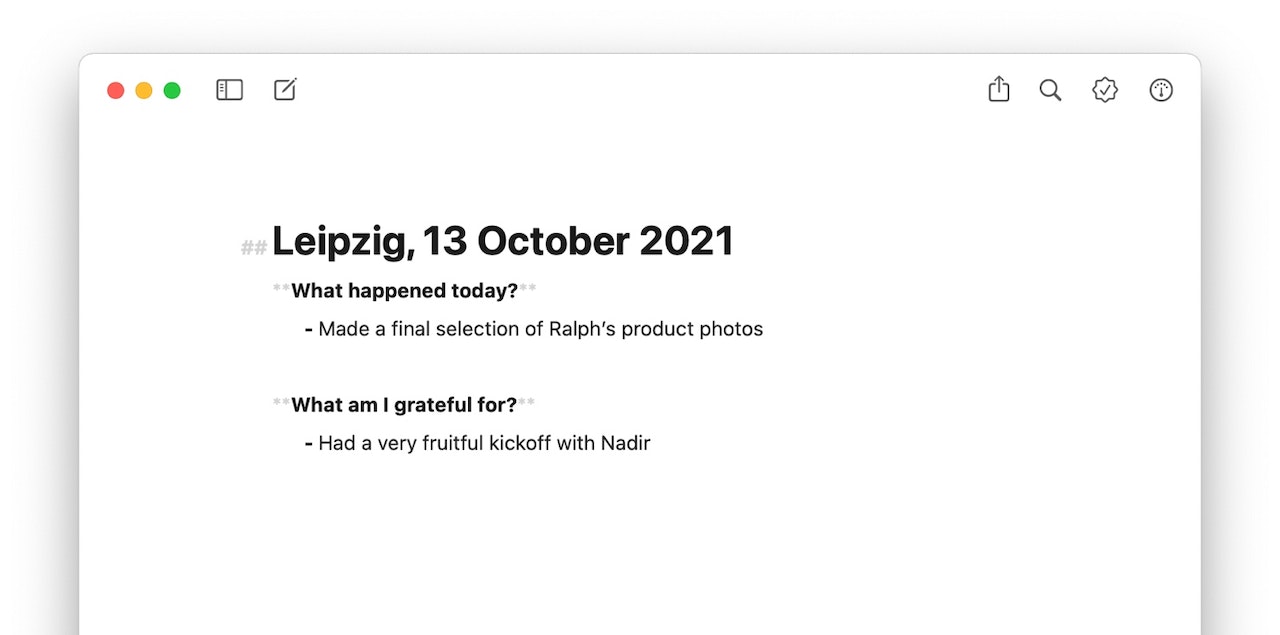
In Ulysses, the newly created sheet should look similar to this.
On iPhone or iPad
Creating a shortcut on your iPhone or iPad is very similar to Mac. Open the Shortcuts app, select “My Shortcuts”, and tap the + button at the top right (1). Now select “Add Action” (2) to browse available actions, or to enter a specific search term (3). Finally, tap on an action to add it to your shortcut.
 |
 |
 |
Shortcut Settings
Now it's time to prepare your new shortcut for daily use. Click or tap the toggle icon in the upper right corner to open the shortcut settings.
At the top left, you can name your shortcut and set a custom icon for it by choosing a color and a glyph. For example, we have named our shortcut “Daily Notes”.
On the right side, you have several setting options. You can change the shortcut settings for all platforms - regardless of which device you are on. Also, the changes you make here will be synchronized across devices. You can change the shortcut’s setup and privacy settings or change the details. For example:
- “Add to Home Screen” lets you add an icon to your home screen on your iPhone or iPad. You will be redirected to a website. Just follow the instructions you get there.
- “Pin in Menu Bar” lets you pin the shortcut to the menu bar for quick access.

Which option you should choose depends on what your shortcut does and how you prefer to work. The “Show in Share Sheet” option is only necessary if you want to run the shortcut while working in another application
You can also ask Siri to run a shortcut. If Siri is activated, you simply have to say the name of the shortcut - in our case, “Hey Siri, Daily Notes”.
For more information about the Shortcuts app, see Apple’s Shortcuts User Guide for iPhone, iPad, and Mac.